When it comes to creating a safe, reliable, and user-friendly checkout process for your customers, you might be looking for an alternative to the standard payment options in WooCommerce.
In fact, you might actually be looking to include a payment method that allows customers to use credit cards but you’re not keen on using PayPal. If this is the case, AIBMS Authipay is for you.
In this guide, we’ll be providing you with step-by-step instructions for adding the AIBMS Authipay payment gateway to your WooCommerce store.
As a bonus, we’ll outline what Authipay is and why you might want to use it in WooCommerce as your payment gateway of choice.
The plugin mentioned in this guide:
- AIBMS Authipay for WooCommerce – Add an Authipay payment gateway to your WooCommerce store with ease.
What is AIBMS Authipay for WooCommerce?
In short, the AIBMS Authipay for WooCommerce payment gateway allows you to take payments via Authipay by AIB merchant services.
So if you already have an AIBMS merchant account, or are thinking of setting one up, this plugin will allow you to take payments using this account on your WooCommerce store.
Setting up your online store with a generic payment processor like PayPal might be tempting. But if you’re thinking about adding something a little different like AIBMS, it has some great benefits.
Authipay accepts all major credit cards Visa®, MasterCard®, Diners/Discover® & Maestro so you don’t have to skip a beat.
Plus, it offers some of the best security around and because customers are taken away from your site to pay, you can be sure the process will be smooth, secure and stress-free.
So now we know what AIBMS Authipay is, let’s get it set up on your WooCommerce store.
How to set up AIBMS Authipay as a payment gateway in WooCommerce
AIBMS Authipay for WooCommerce allows you to accept fast and secure payments in no time at all.
It also:
- Can be set up in less than 20 minutes using our very own step-by-step setup wizard.
- Benefits from the best security around.
- Can be used with WooCommerce checkout blocks to make setup even easier.
- Is translation ready, compatible with WPML and other translation tools like Loco Translate.
Install the plugin
To get started, download AIBMS for WooCommerce from the We Are AG store: weareag.co.uk/aib-authipay-for-woocommerce
Then follow these steps:
- Go to Plugins > Add New > Upload Plugin.
- Choose the zip file you downloaded, upload, and then click Activate Plugin.
- Once activated, you’ll need to enter your licence key.
- Once the plugin is activated, you’ll be presented with a plugin setup wizard. This will take you through the steps you need to set up your Authipay payment method in WooCommerce.
Set up the AIBMS payment method
Now we have the AIBMS plugin installed on your WooCommerce store, let’s walk through the setup wizard and get it working.
Note: The following steps presume you already have an Authipay Connect Account.
Step 1: Collect your details
The first step in the wizard asks you to gather a few things before continuing.

So, before you get started, make sure you have your Store ID and Shared Secret ready. The Authipay Connect team will send you two emails when you sign up, one with the Store ID and another with a Shared Secret.
This step also recommends that you have your Authipay account in test mode so you can send a few orders before going live.
Step 2: Enter your details
The next step asks you to enter the Store ID and Shared Secret you gathered earlier. To make it easier, the wizard gives you the option of going into your settings to do it, or on the wizard directly.

Step 3: Set your store URLs
The next step is done entirely in your merchant account. The wizard walks you through where to log in and the exact URLs you need to change to make sure your merchant account and WooCommerce work well together.

Step 4: Let’s get testing
The last step of the wizard gives you a few options for testing the AIBMS Authipay gateway.
We recommend doing multiple tests to make sure everything is working smoothly and in this section of the wizard you can add some test products and enable the error log to track any potential setup problems.

Once you’re happy, click Next Step and we’re done!
The last page of the wizard will give you some handy docs you can use to troubleshoot if you have any problems. If however, your solution isn’t there, you can contact our friendly customer support for some additional help.
Extra settings you might want to change
We have the basics of AIBMS Authipay setup, but if you’re looking to make some additional changes, take the following steps:
- From your WordPress dashboard go to, WooCommerce > Settings and click the Payments tab.
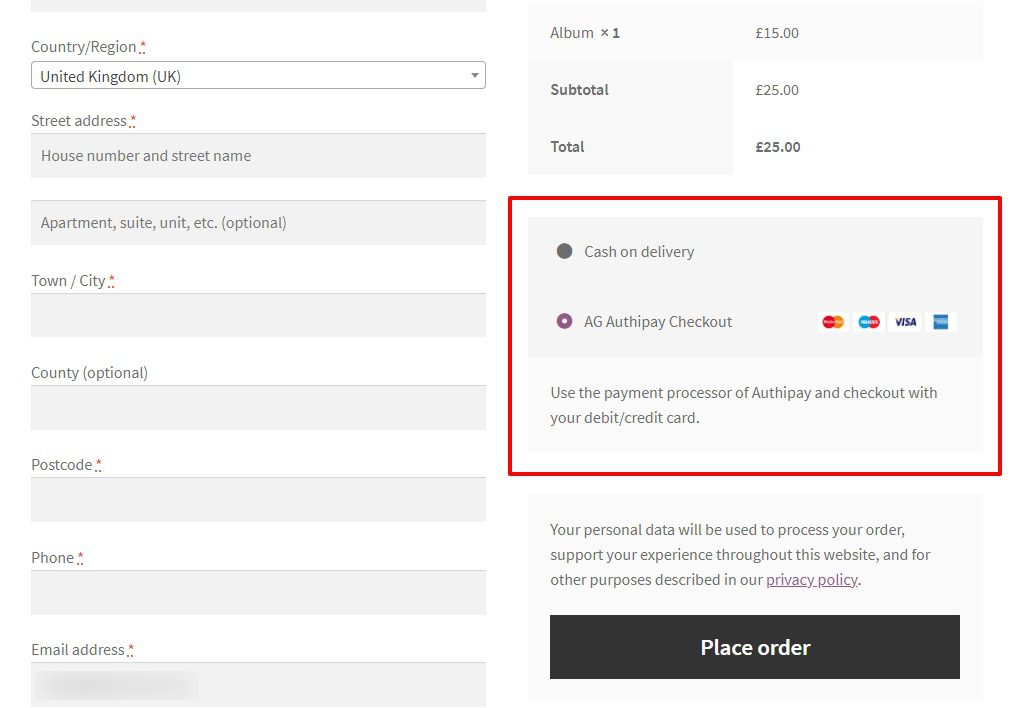
- You’ll now see AG Authipay listed as one of your payment methods in the payment methods table.

- To edit this, click the Manage button to the right.
- Once here, you’ll be able to change everything from the payment method’s title, description and which card image icons you want to add to the checkout.

- This is also where you can set the Store Status. Once you’ve finished testing AIB Authipay, change this from Test Environment to Live Store and do the same in your merchant account.
Add AIBMS Authipay to your WooCommerce store
That’s it, with AIBMS Authipay setup and running, you’ll be able to take online payment through your Authipay account on your WooCommerce store.
Using Authipay in this way will not only provide customers with a smooth buying experience but a trusted and secure one too.
The plugin featured in this guide:
- AIBMS Authipay for WooCommerce – Add an Authipay payment gateway to your WooCommerce store with ease.