Hey there! Ready to take this plugin live? Awesome! First, make sure you’ve received your live account and keys for a live site from the super helpful Worldline team. Once you have these, you’re going to want to pop them into the settings. Plus, remember to set our plugin to start processing live payments.
Keep an eye out for the ‘Enable Test Mode‘ option and uncheck it to kick it into Live mode.
Don’t forget to hit the ‘save changes’ button on the same page to lock in all your hard work.
Now, for a bit of fun, go ahead and create a product (something cheap and cheerful) and buy it yourself to make sure those live transactions are working like a charm.
Note
Friendly reminder: Before you get started with testing, make sure your LIVE website is all set up with an active SSL, isn’t hidden from the web with an IP block, and doesn’t have any extra hoops to jump through like editing the host files on local machines. This way, you’ll avoid any pesky authorization errors for payment requests.
Step 2 – Let’s Make a WooCommerce Product
If you’re just dipping your toes into the WooCommerce pool, it might be a good idea to check out this guide first. The product you’ll create next is going to be the one you test purchase with – how exciting!
Step 3 – Setting Up the Product
Ready to play editor? Scroll down your product until you find the ‘Product data’ section. This is where all the key info about your product lives. Since you’re making a live transaction, you can set the product’s regular price to be just £0.01 (this will be a teeny tiny deduction from your live credit card).
You can access this section from the:
Note
Product data section > General tab
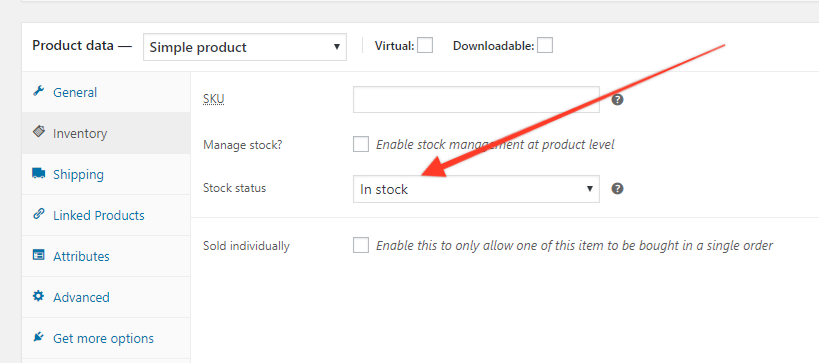
Next up, make sure the Inventory tab > Stock Status is set to ‘In Stock‘.
If you’ve got a live store and don’t want your customers to stumble on this test product, you can make it invisible. Just head to the right side of your product page under the ‘Publish’ section, look for the ‘Category visibility‘ option and click ‘edit’.
A few more options will pop up. Select the ‘hidden‘ radio button and click ‘OK’.
Don’t forget to update or publish your changes on your WooCommerce product. It’s like hitting the save button on your progress.
Step 4 – Let’s Add the Item to the Shopping Cart
Visit the product page you just created and click the ‘add to cart’ button.
Step 5 – Checkout Process
Click the cart icon on your header and then ‘Proceed to checkout’. Once you’re on the checkout page, fill in all the required details and your card info. Click through the checkout process to order the product. If everything goes as planned, you’ll see an ‘order received’ message – a little high five for your successful transaction.
What if there is an error?
If you happen to stumble upon an error. Reach out to our ever-ready support team, who are always equipped to iron out any wrinkles you might come across.