Start here
Welcome to the setup guide.
Setting up this plugin should only take around 20 minutes. This guide is broken down into steps to make the process as smooth as possible. Firstly, you should perform a test transaction using the Tyl By NatWest test account. The Tyl by NatWest team will send you two emails when you sign up, one with the Store ID and another with a Shared Secret. Once you have completed the necessary tests in test mode, you can switch to live mode and follow the same steps for the live Tyl By NatWest account.
It’s always best practice to set up a payment gateway in test mode first and run several orders before switching to live mode.
Getting Ready
Before diving in, make sure you have:
- An active Tyl by NatWest merchant account. Don’t have one yet? Get in touch with Tyl to set it up.
- Access to the backend of your WooCommerce website.
Step 1 – Plugin settings.
Install the plugin and activate the license key. After that, you need to navigate to the plugin settings page, which can be found in WooCommerce settings:
The essential items required for setup are the Store ID and Shared Secret. These details will be supplied by the Tyl By NatWest team when you sign up for an account.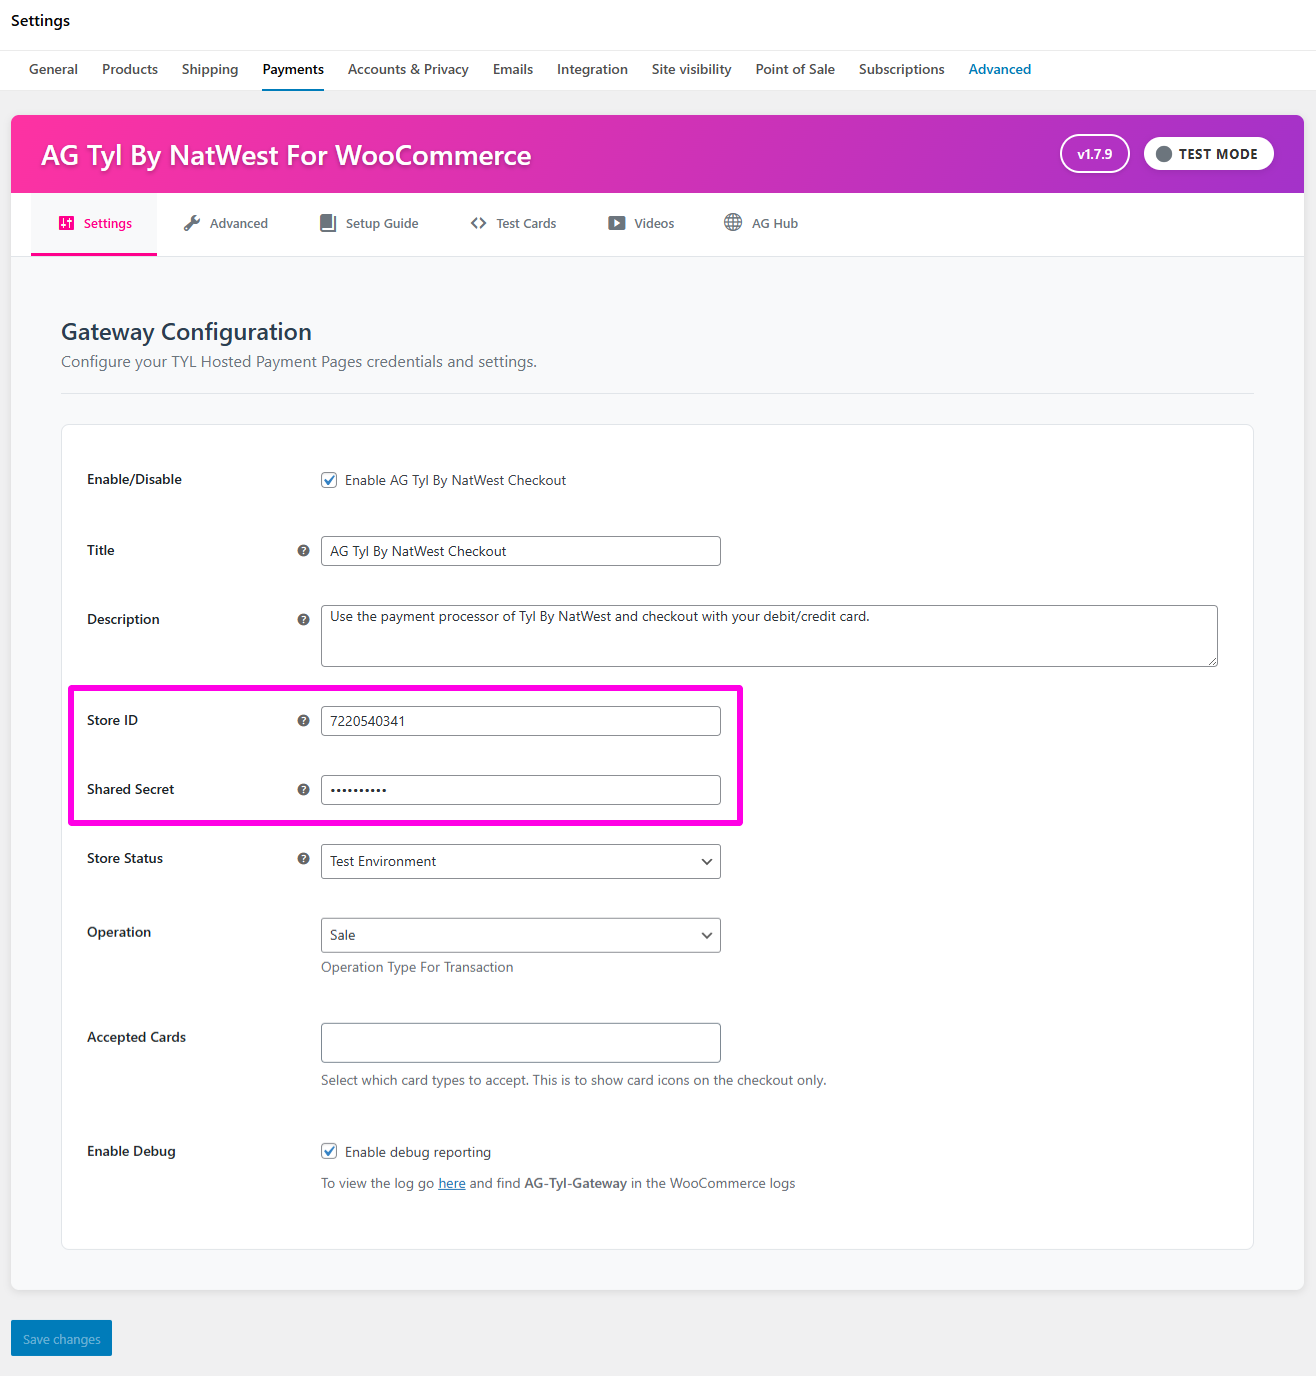
Step 2 – Setting the operation mode for the payment gateway
In this section, you need to decide which operation mode to use for the payment gateway. You can set this option from the WordPress dashboard >> WooCommerce >> Payments >> AG Tyl by NatWest Checkout Settings.
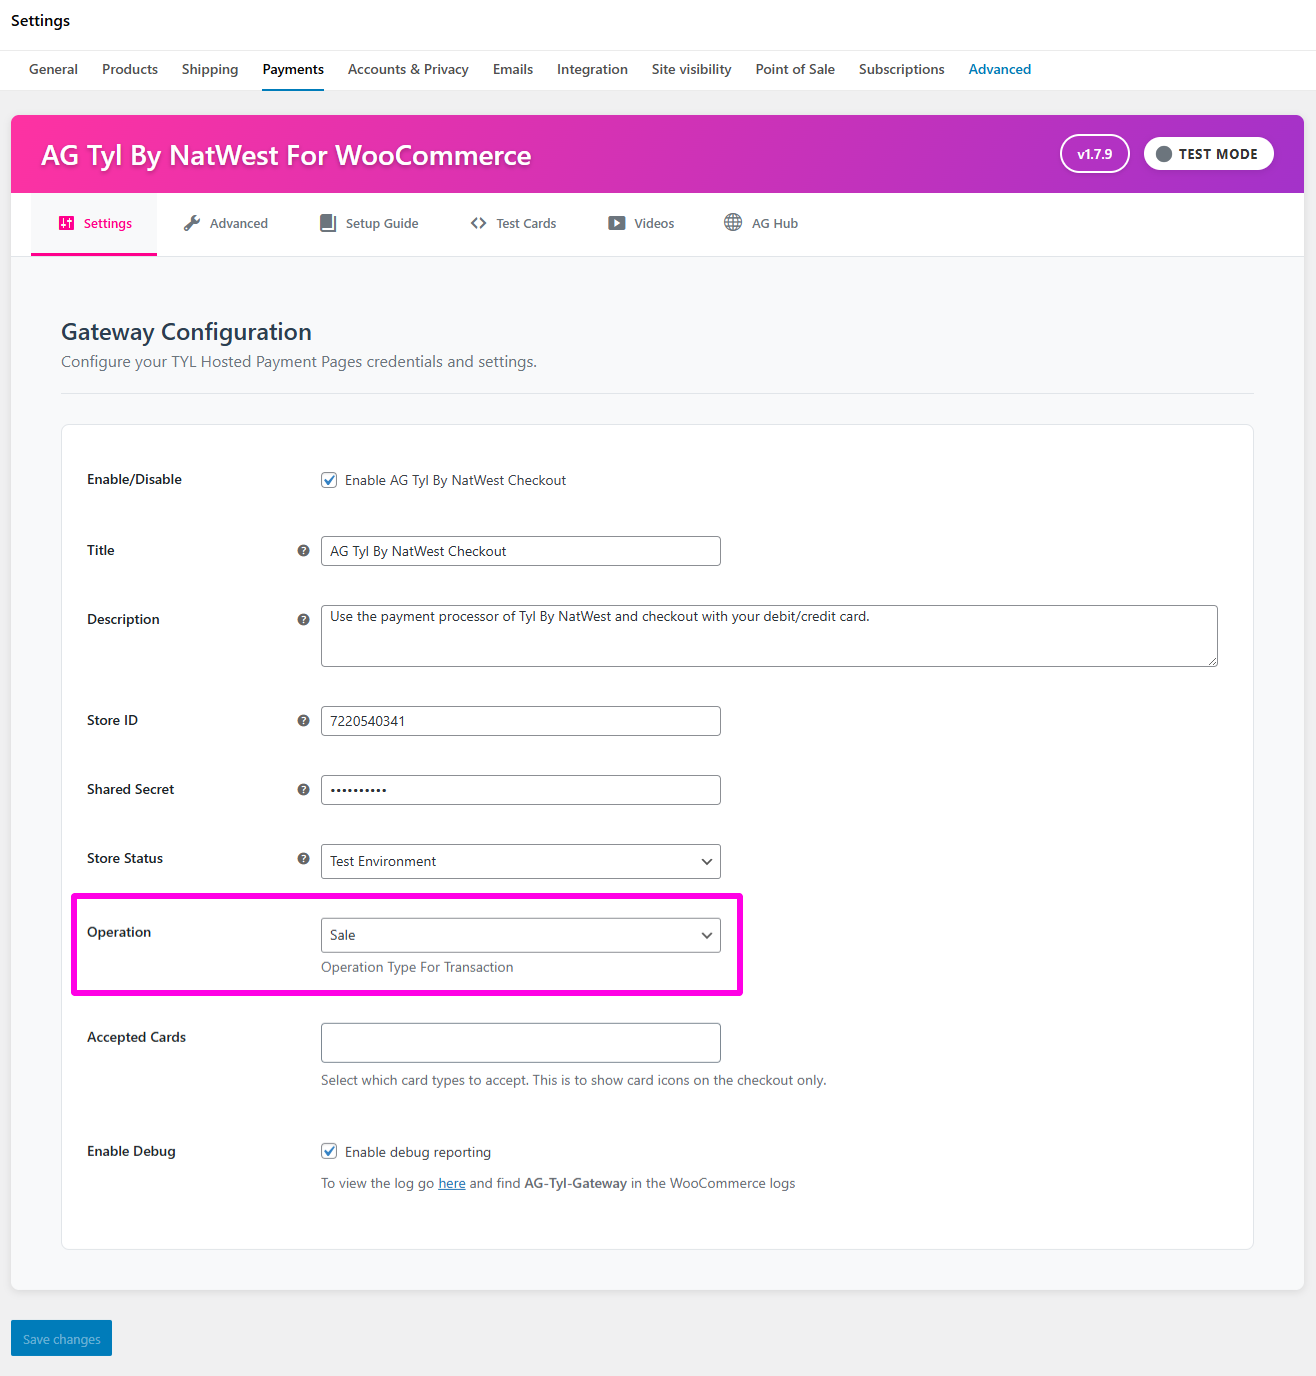
Our plugin supports two types of transactions: pre-authorization and sale.
Pre-authorization: The authorization and data capture (payment request) steps are performed separately at different times. This means that the money remains in the customer’s account until a data capture is performed. Pre-authorization is useful when you need to reserve funds for a future payment, such as for a hotel reservation or rental car booking.
Sale: Our plugin automatically requests payment (i.e., transfers the amount) immediately after a successful authorization. This type of transaction is often used for goods and services that are delivered online, such as digital products or subscriptions.
Step 3 – Accessing Tyl By NatWest back office
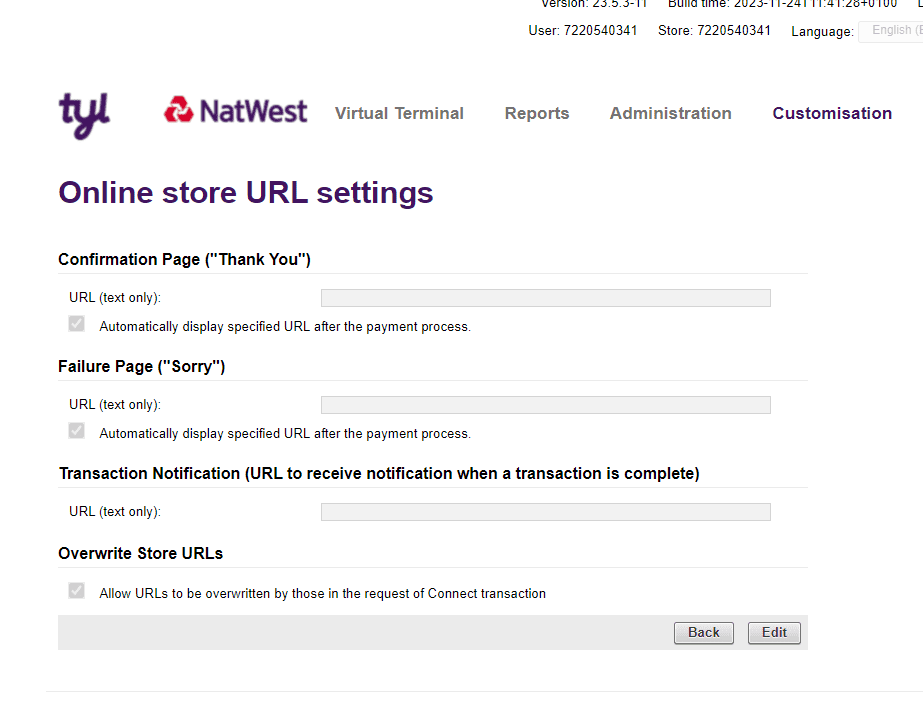
To proceed with the next step, you’ll need to log in to the Tyl By NatWest back office. You can access the test account login page here. If you encounter any login issues, don’t hesitate to contact the Tyl By NatWest support team at online@support.natwest-tyl.com for assistance.
From here, please ensure that the “Overwrite Store URLs”, and “Automatically display specified URL after the payment process.” checkboxes are ticked, while the input fields for the URLs are blank as the plugin already sets them from the background process automatically.
Step 4 – Test, test & test.
Congratulations! You have now completed the setup of the plugin. The next important step is to test the payment gateway multiple times before going live. In case you encounter any errors or issues during testing, the first thing to do is to check the error log.
What if there is an error?
If you encounter any errors or issues, don’t worry, our support team is here to help. You can refer to our comprehensive troubleshooting guide for solutions to common problems, or you can reach out to our friendly support team members, who will be happy to assist you in resolving any issues you may be experiencing. We are committed to ensuring that your experience with our plugin is as smooth and hassle-free as possible, so don’t hesitate to contact us if you need any assistance.
Was this helpful?