Start here
Welcome to the CardStream for WooCommerce setup guide. Follow the steps below to get your gateway up and running. Setting up the plugin should only take around 20 minutes.
Before you begin
Make sure you have the following before starting:
- An active CardStream merchant account with your Merchant ID and Signature Key.
Don’t have one yet? Contact CardStream to set up your account. - Admin access to the backend of your WooCommerce website.
Step-by-step setup
Get your credentials from the CardStream MMS
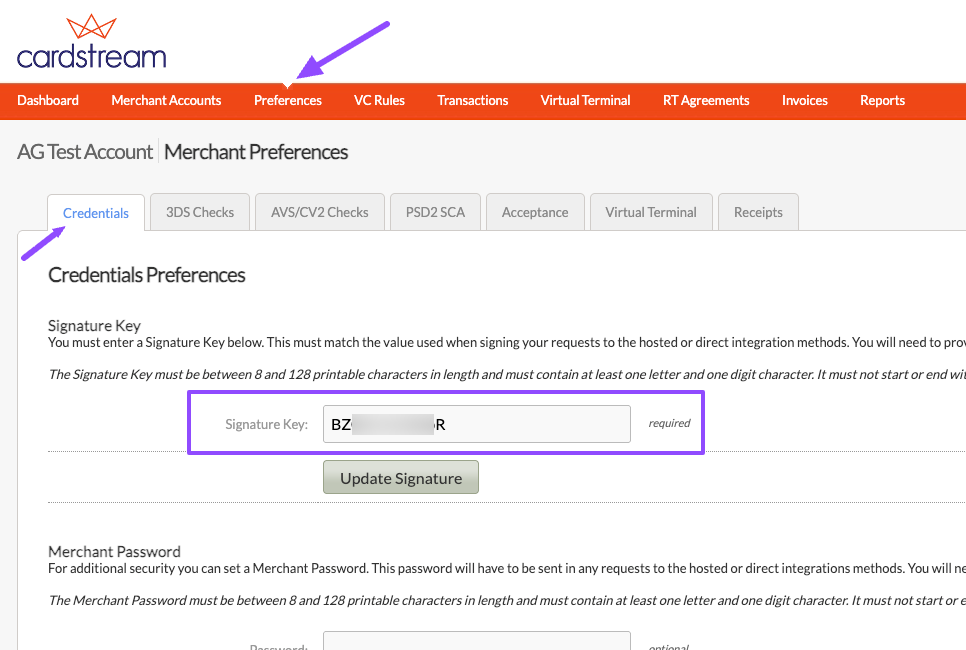
Log in to the CardStream Merchant Management System (MMS) to find your Merchant ID and Signature Key. Navigate to:
Preferences → Credentials → Direct IntegrationYour Signature Key is listed under Credentials Preferences. If you don’t have access, contact CardStream to request your credentials.
Enter your credentials in the plugin
In your WordPress admin, go to the plugin settings:
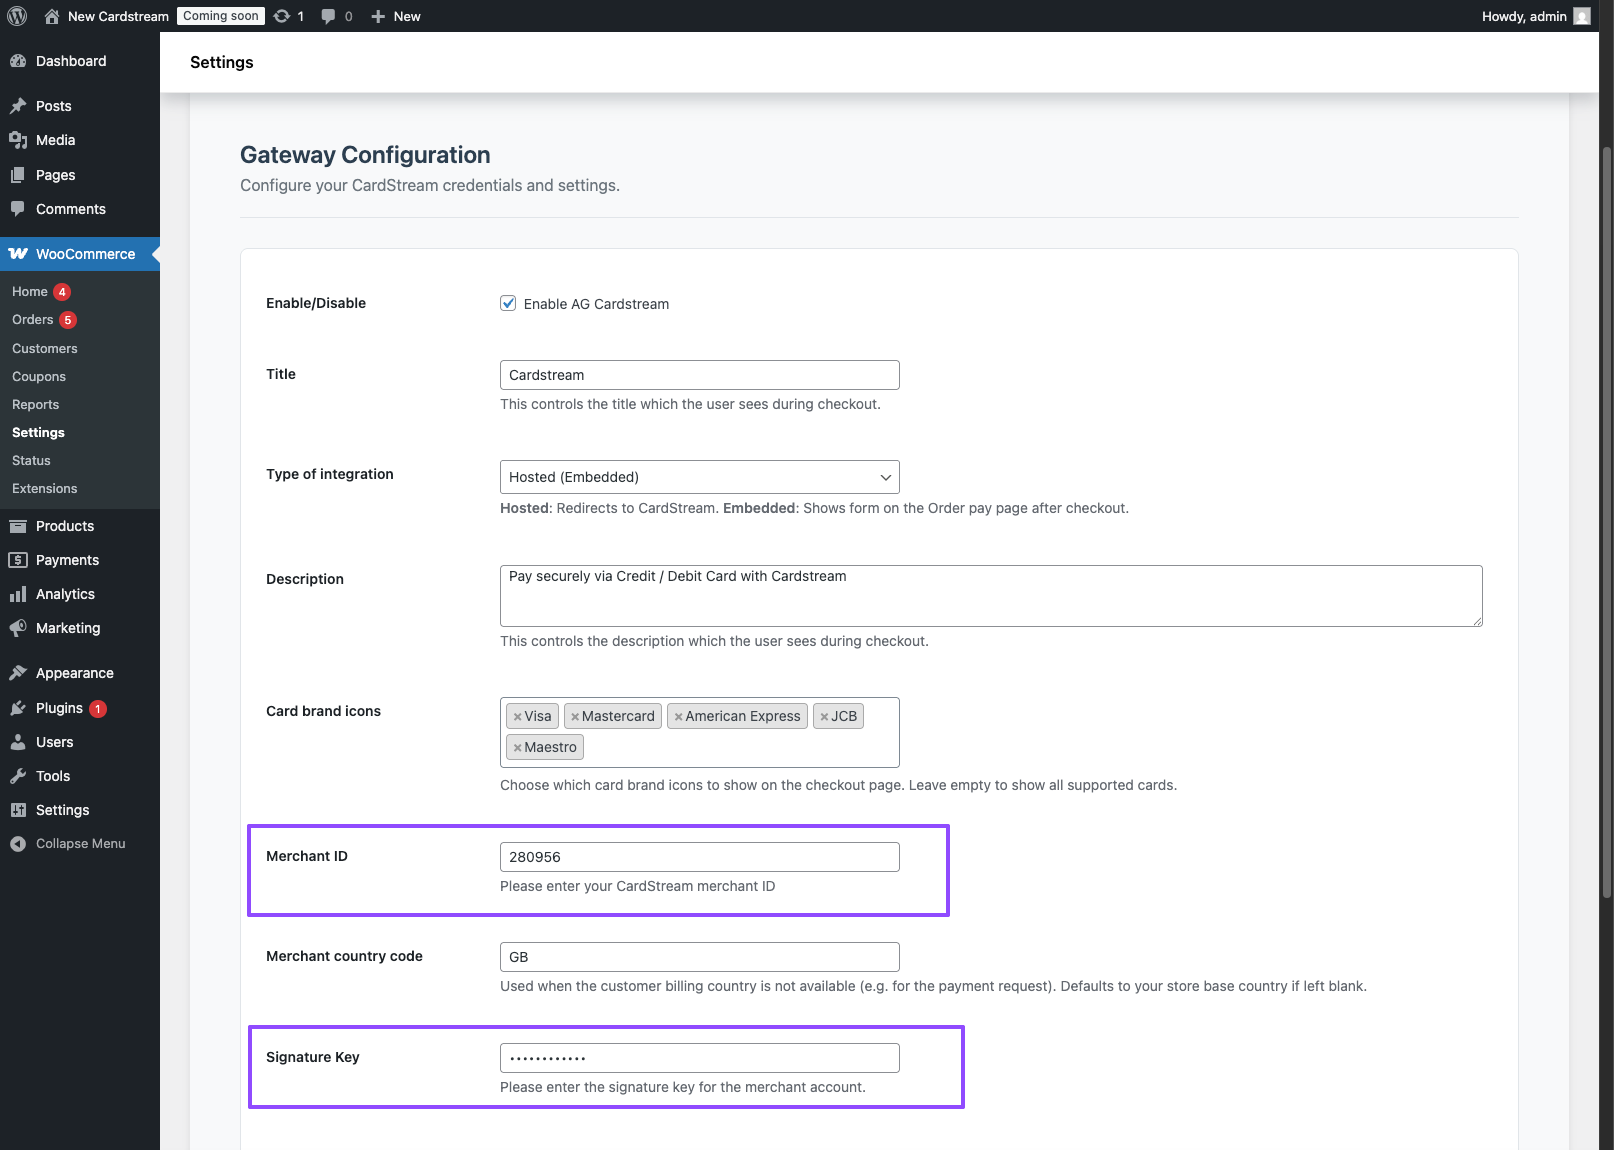
WooCommerce → Settings → Payments → AG CardStreamOpen the Settings tab and enter the following:
| Field | Description |
|---|---|
| Merchant ID | Your CardStream merchant identifier. |
| Signature Key | Used to sign requests to CardStream. Keep it secure. |
| Merchant country code | Optional. Defaults to your store’s base country if left blank. |
Enable refunds — add your server IP to the MMS
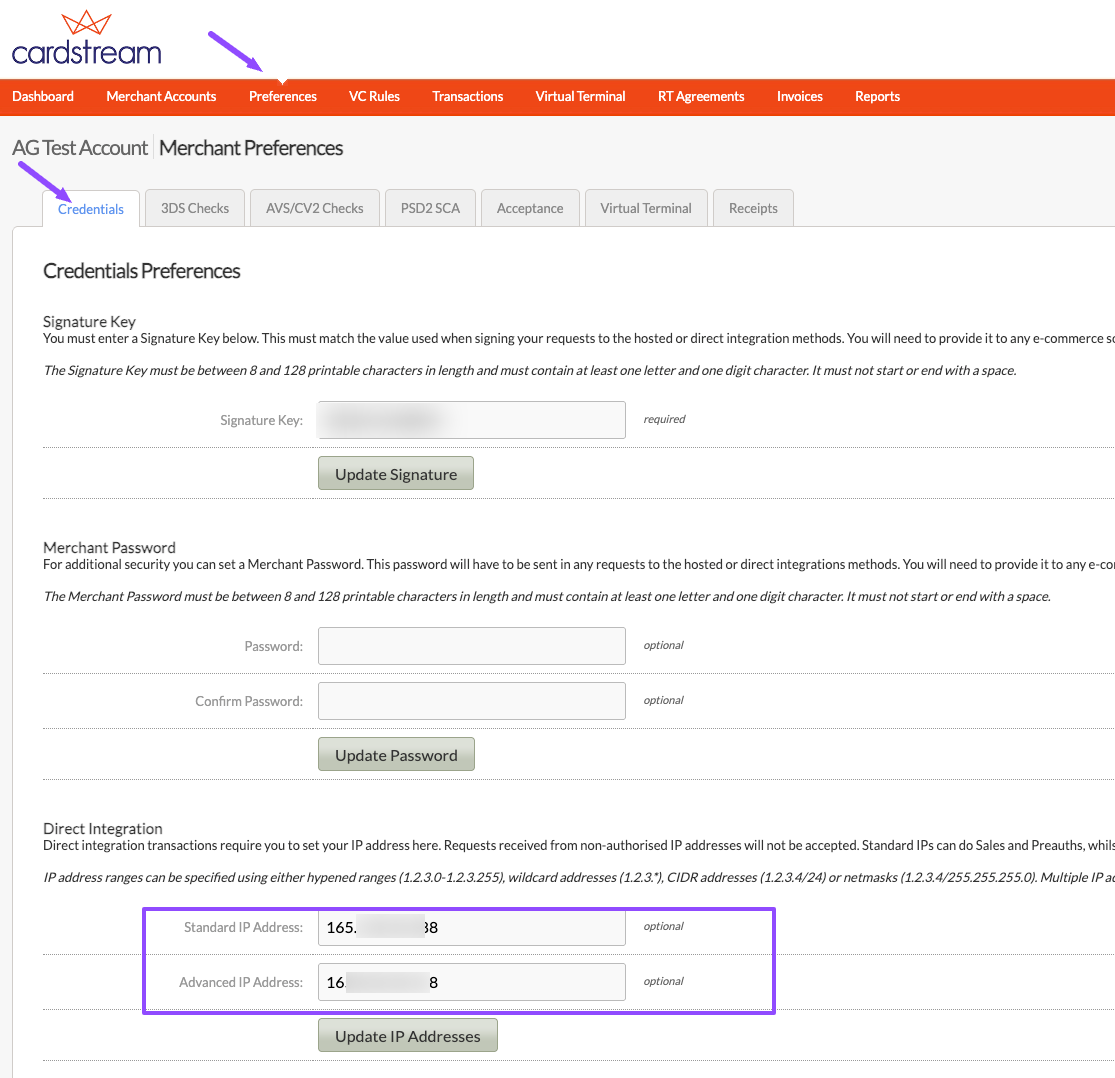
Refunds from WooCommerce are sent to CardStream from your server. For refunds to work, you must whitelist your server’s IP address in the MMS. Log in and go to:
Preferences → Credentials → Direct IntegrationAdd your store’s server IP address to the allowed list. Without it, all refund requests will be rejected by CardStream.
Test before going live
Enable Test Mode in the plugin Settings tab, then run a few test transactions and a refund to confirm everything is working. Use the Test Cards tab in the plugin for available test card numbers.
Work through the following checklist before switching to live mode:
- Successful and failed payments
- 3D Secure challenge (if your account uses it)
- A refund after adding your IP to the MMS
- Order notes for callback updates
WooCommerce → Status → Logs.What if there is an error?
If you run into issues, check debug logging first — it will usually point directly to the problem. You can also refer to the troubleshooting section of the documentation, or reach out to the support team who will be happy to help.
Was this helpful?