Setup
Welcome to the Opayo Payment Gateway integration guide! This guide will walk you through setting up and integrating Opayo with WooCommerce. We’ll cover the Opayo Form, Server, Direct and PI integration methods supported by the plugin.
Pre-Setup Checklist
Before you begin, make sure you have the following ready:
-
An active Opayo account: Confirm that your Opayo account is set up and active.
-
Access to your WooCommerce dashboard: You’ll need admin access so you can install and set up the plugin.
- An active plugin license key: This is required to activate the Opayo plugin.
Important Key Credentials
You’ll need a few details from your MyOpayo account. Don’t worry, these are easy to find:
-
MyOpayo Credentials: This is the Vendor Name, Vendor Password, and Encryption Password.
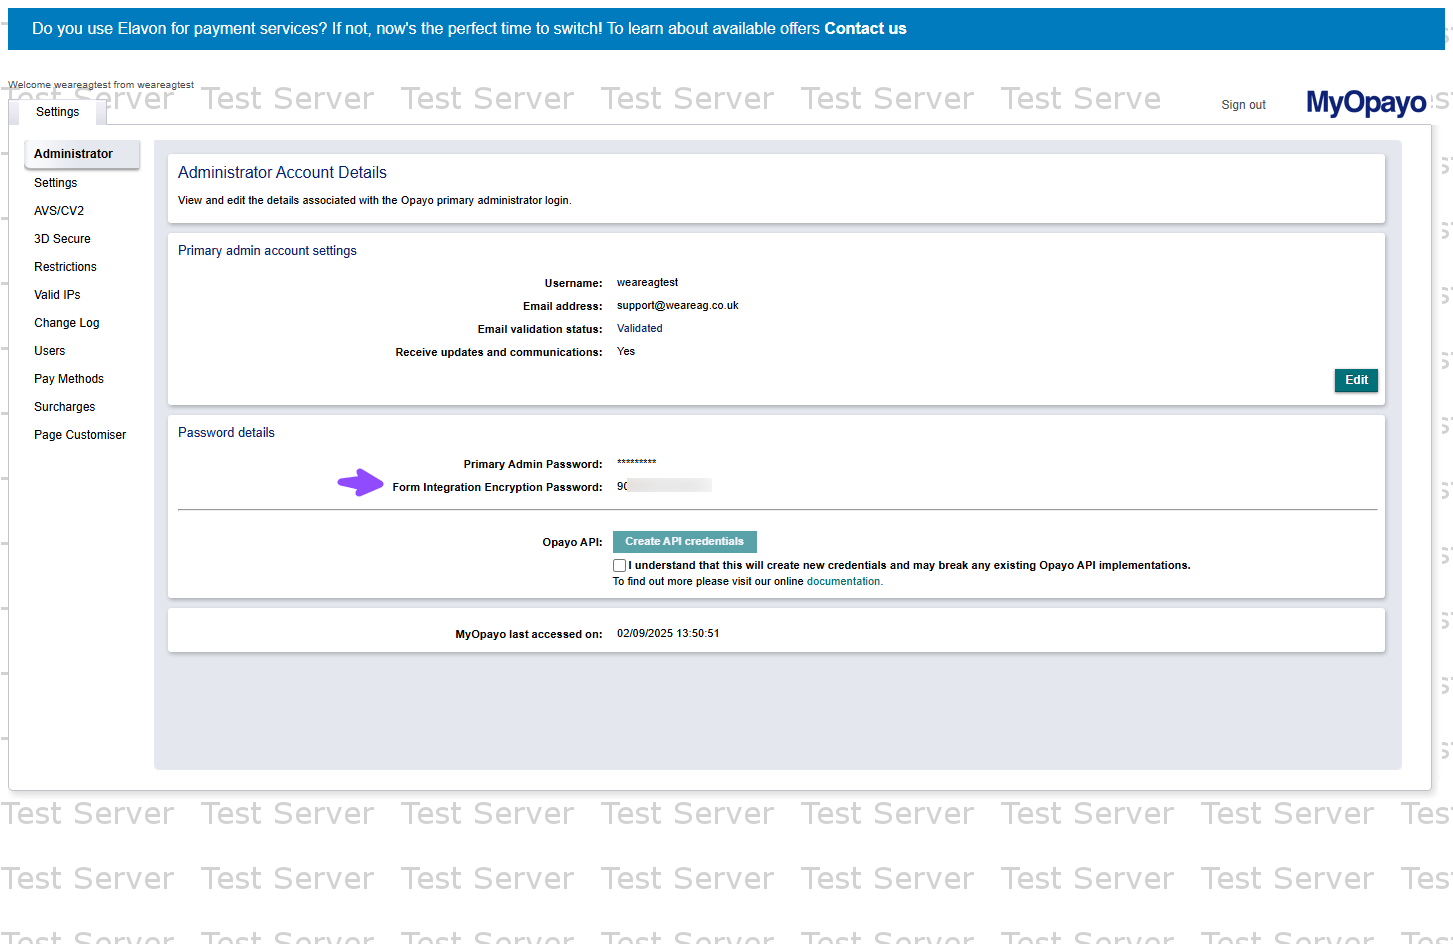
Opayo gives you your Vendor Name (typically made up of letters). This is what you use to sign in to MyOpayo. Your Vendor Password is the same password you use to log into MyOpayo. You’ll also need your Encryption Password, this guide will walk you through how to get this detail.
- Integration Credentials: These are needed for the new PI integration option. Instructions on how to generate them are provided below.
Accessing MyOpayo Environments
- Test Environment: Start with the Opayo test environment to safely simulate transactions.
- Live Environment: When you’re ready to go live, switch to the Opayo live environment.
Step 1: Install the Plugin and Activate Your License Key
In this guide, we will first walk through the Server option setup.
Setting Up the Server Integration
To set up the Server option, follow these steps:
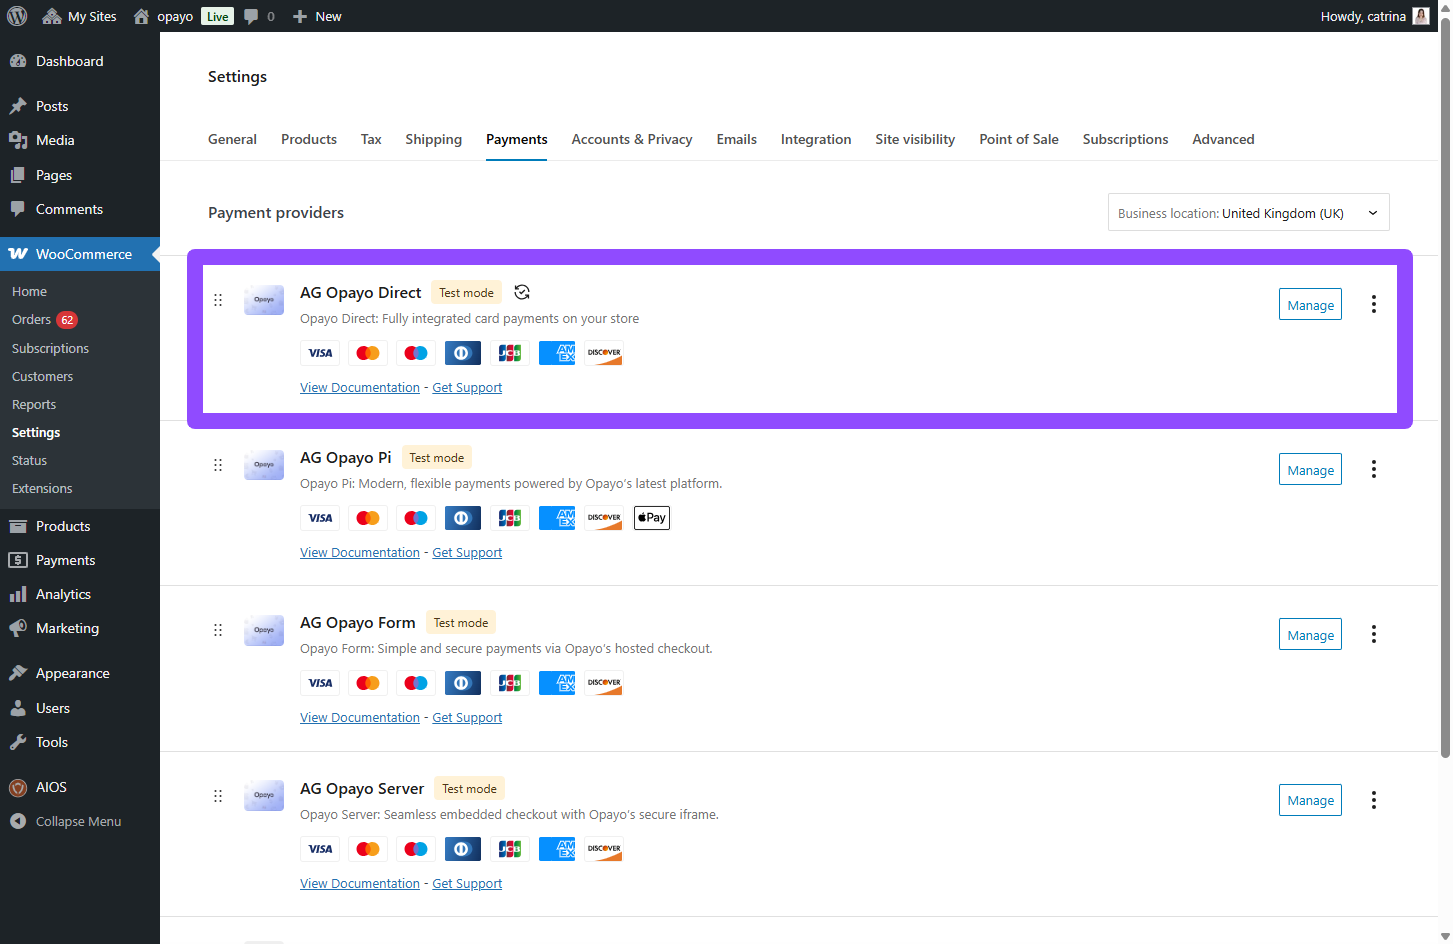
- Navigate to WooCommerce > Settings > Payments > AG Opayo Server > Manage. This will take you to the Plugin Settings page.
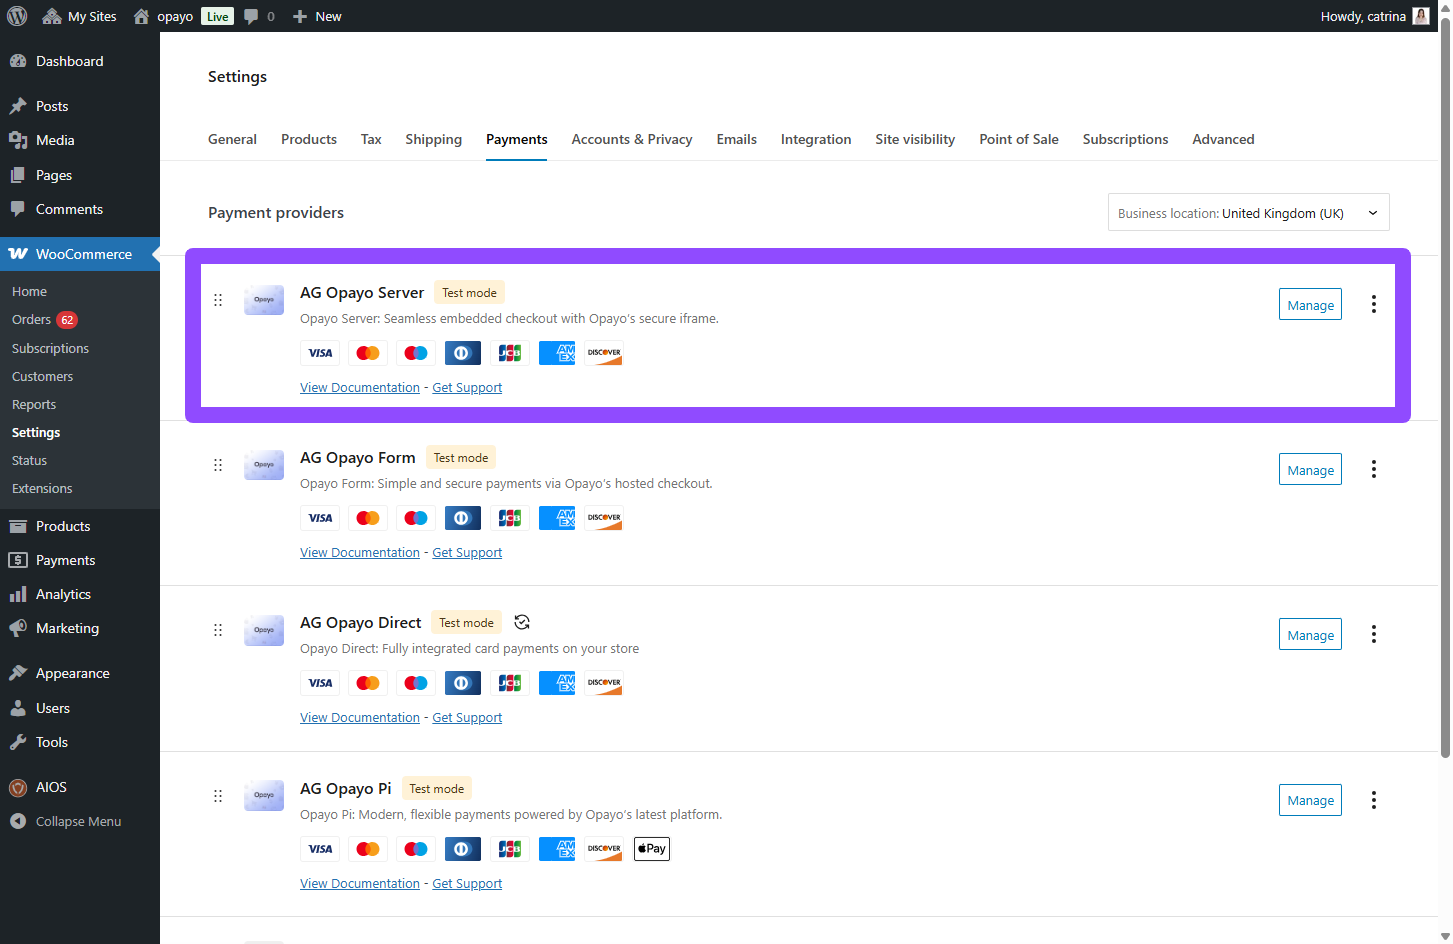
- Enter your Vendor Name.
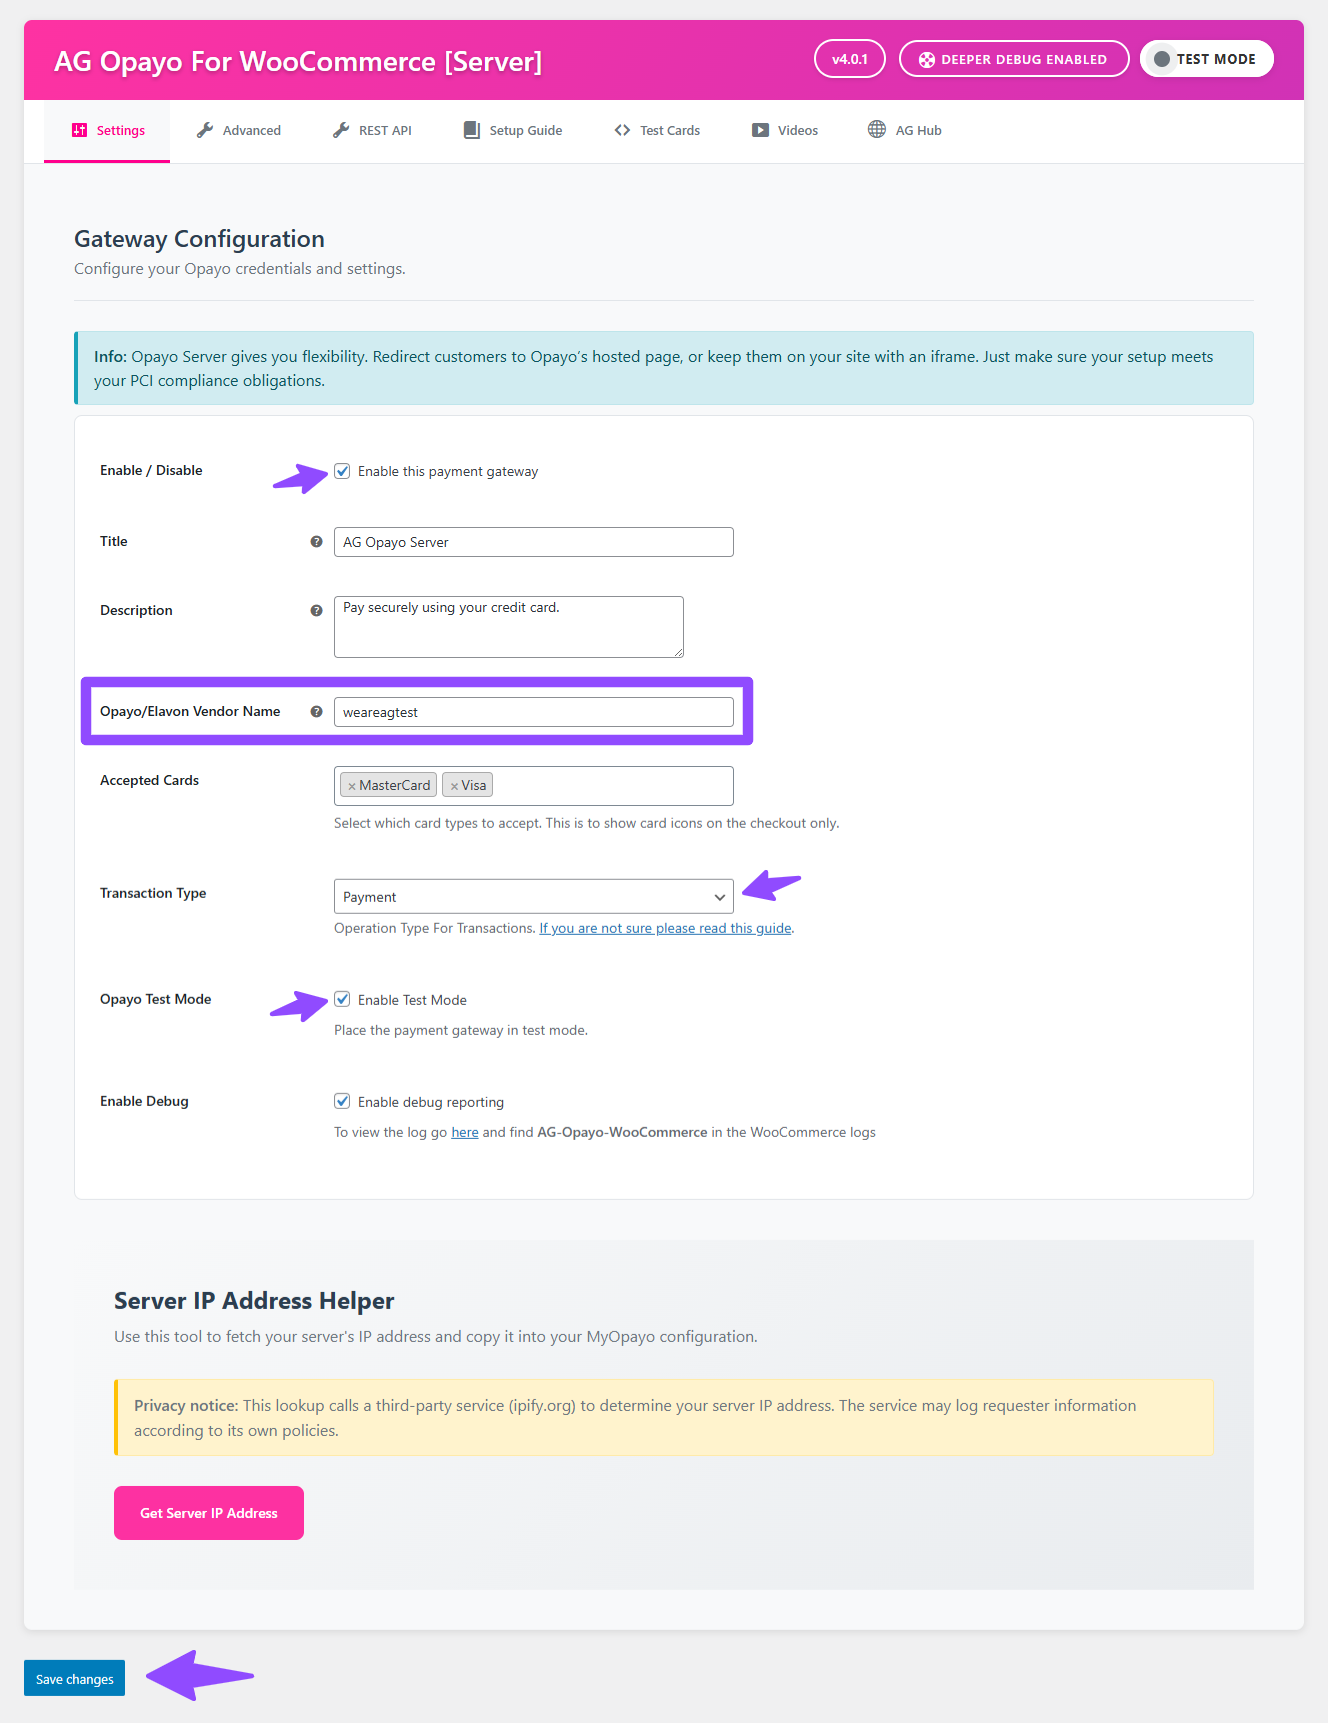
- Choose the transaction type for your payment gateway.
You can select Authenticate to authorize and capture payments separately, or Payment to transfer the amount immediately after authorization. - Enable Test Mode. It’s always recommended to use the Test Vendor Account and work in a staging environment before going live.
- Log in to your MyOpayo account.
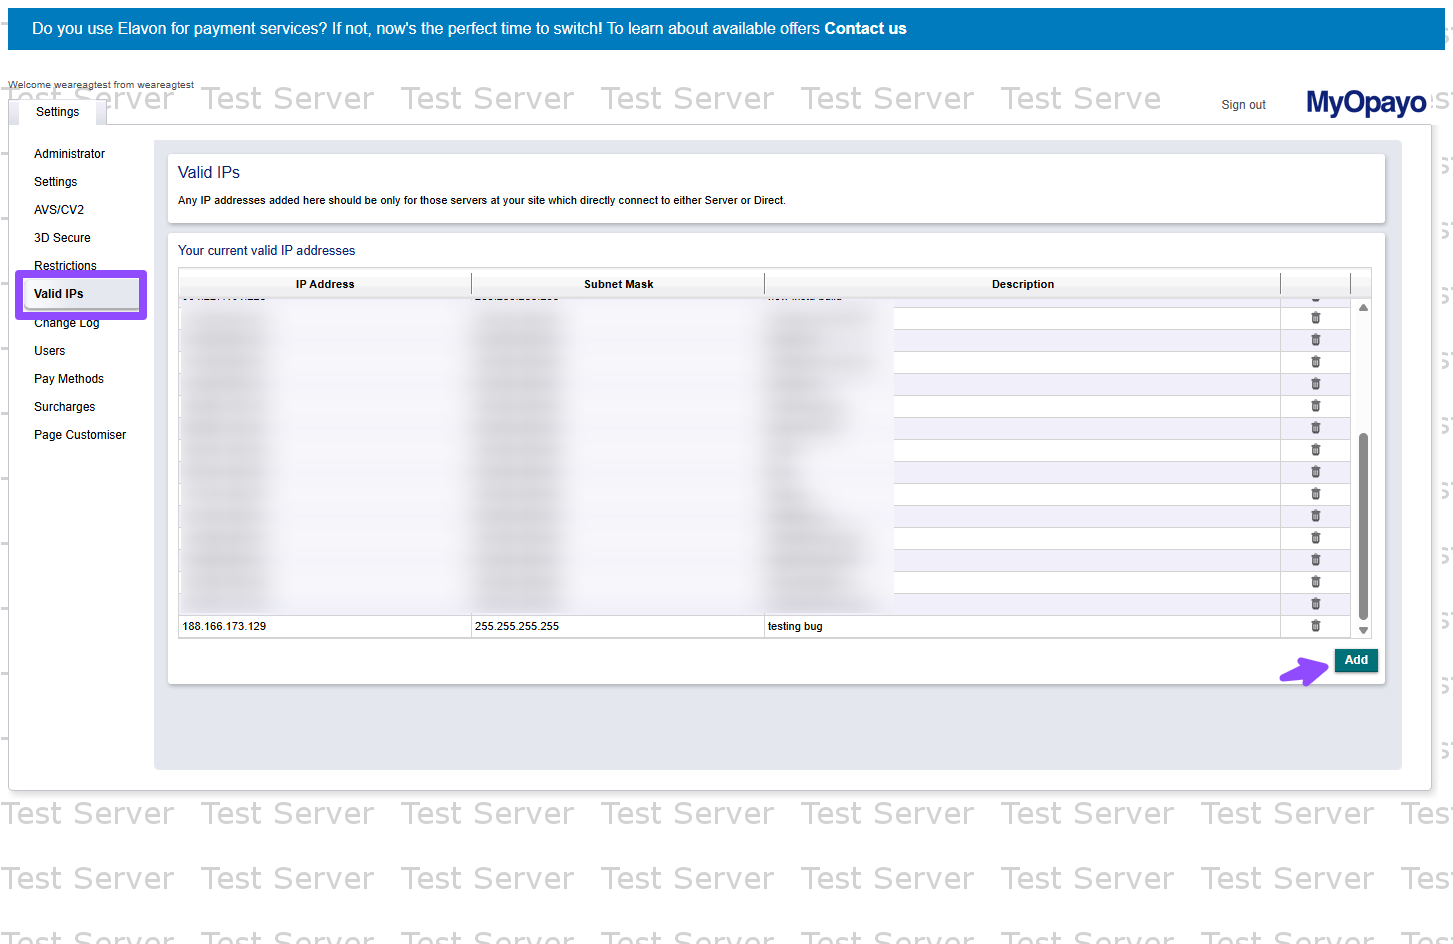
- Whitelist your server IP address. Use a tool like Site24x7 to find your server’s IP address, then add the IP to the whitelist in your MyOpayo account with a subnet mask of 255.255.255.000.
- Perform a test payment to ensure everything is set up correctly before switching to the live environment.
Setting Up the Form Integration
Now, let’s set up the Form option.
- Navigate to WooCommerce > Settings > Payments > AG Opayo Form > Manage. It will prompt to the plugin settings page.

- Enter your Vendor Name.
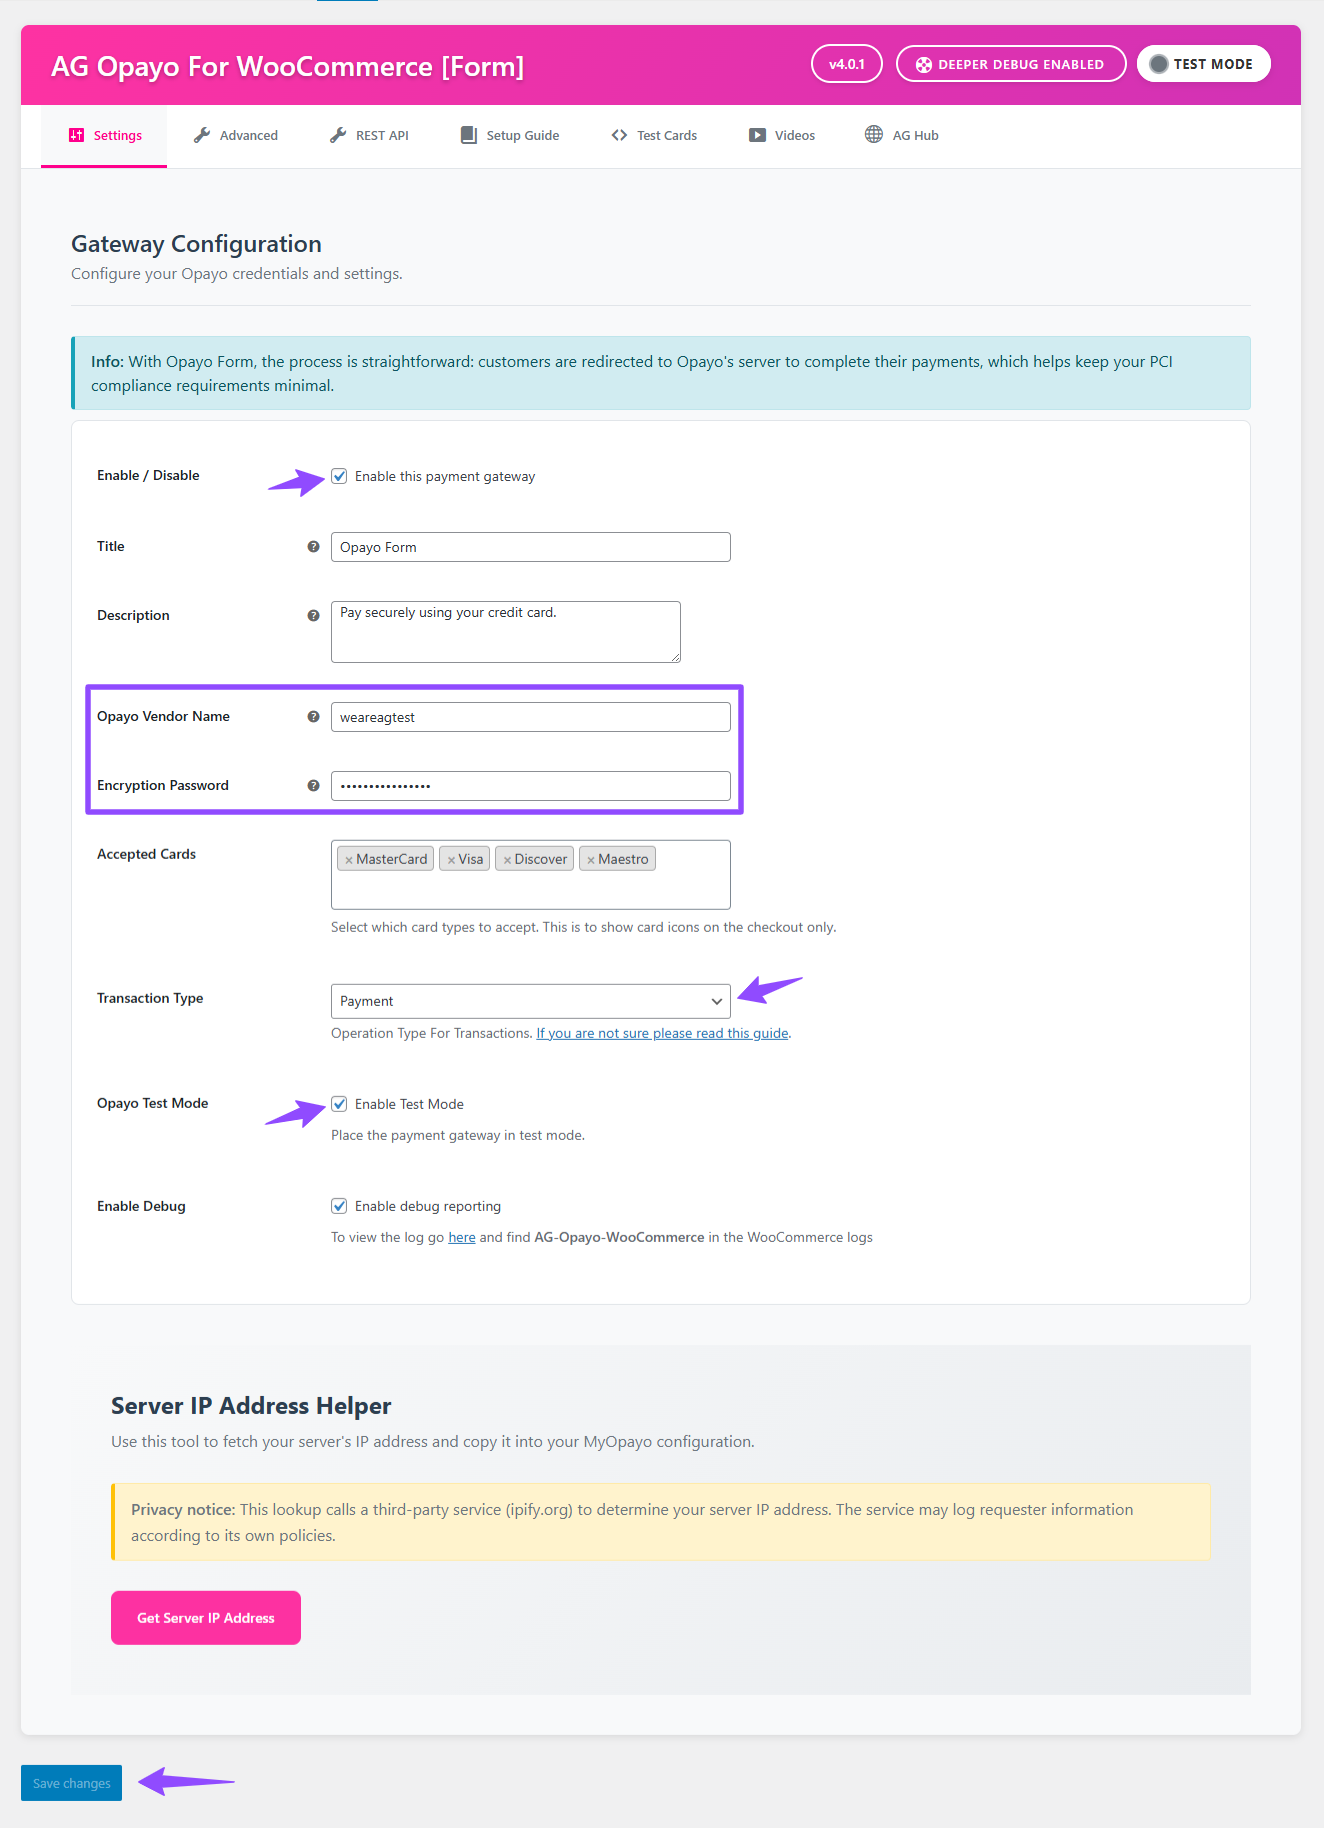
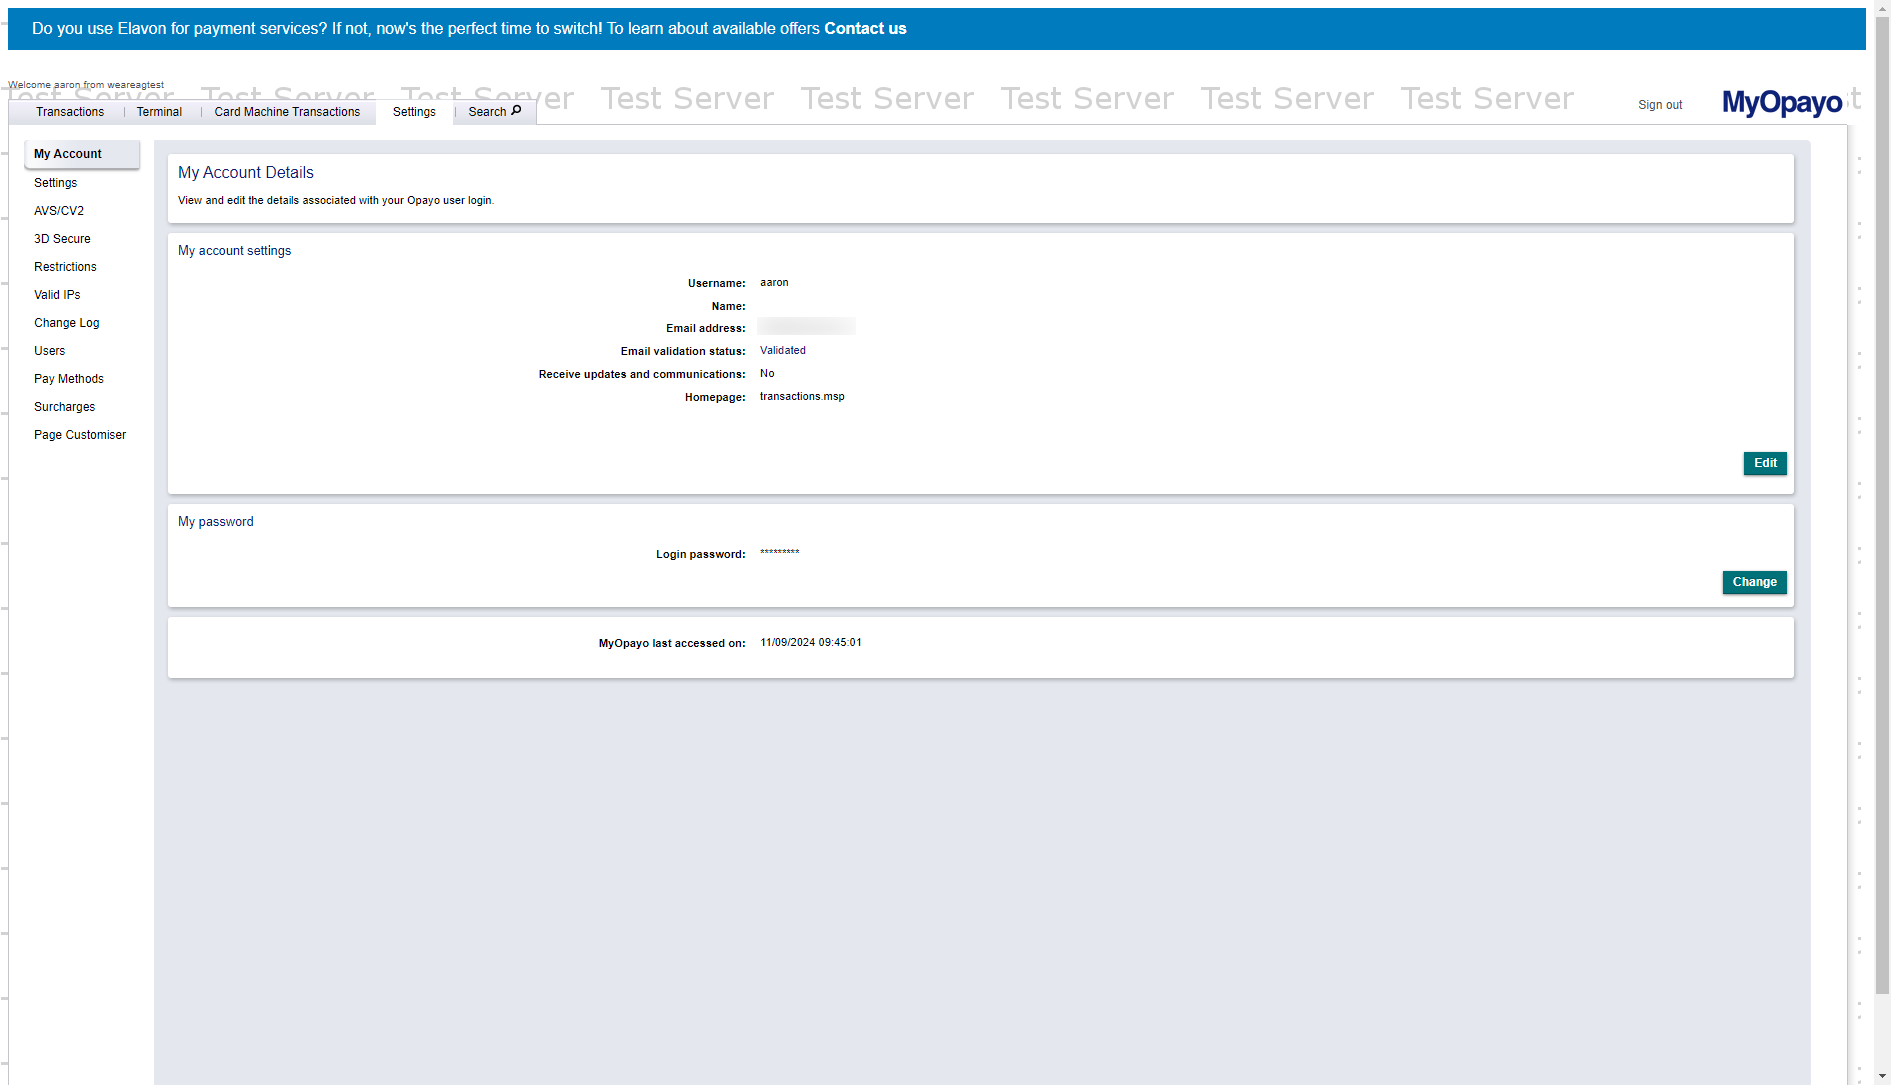
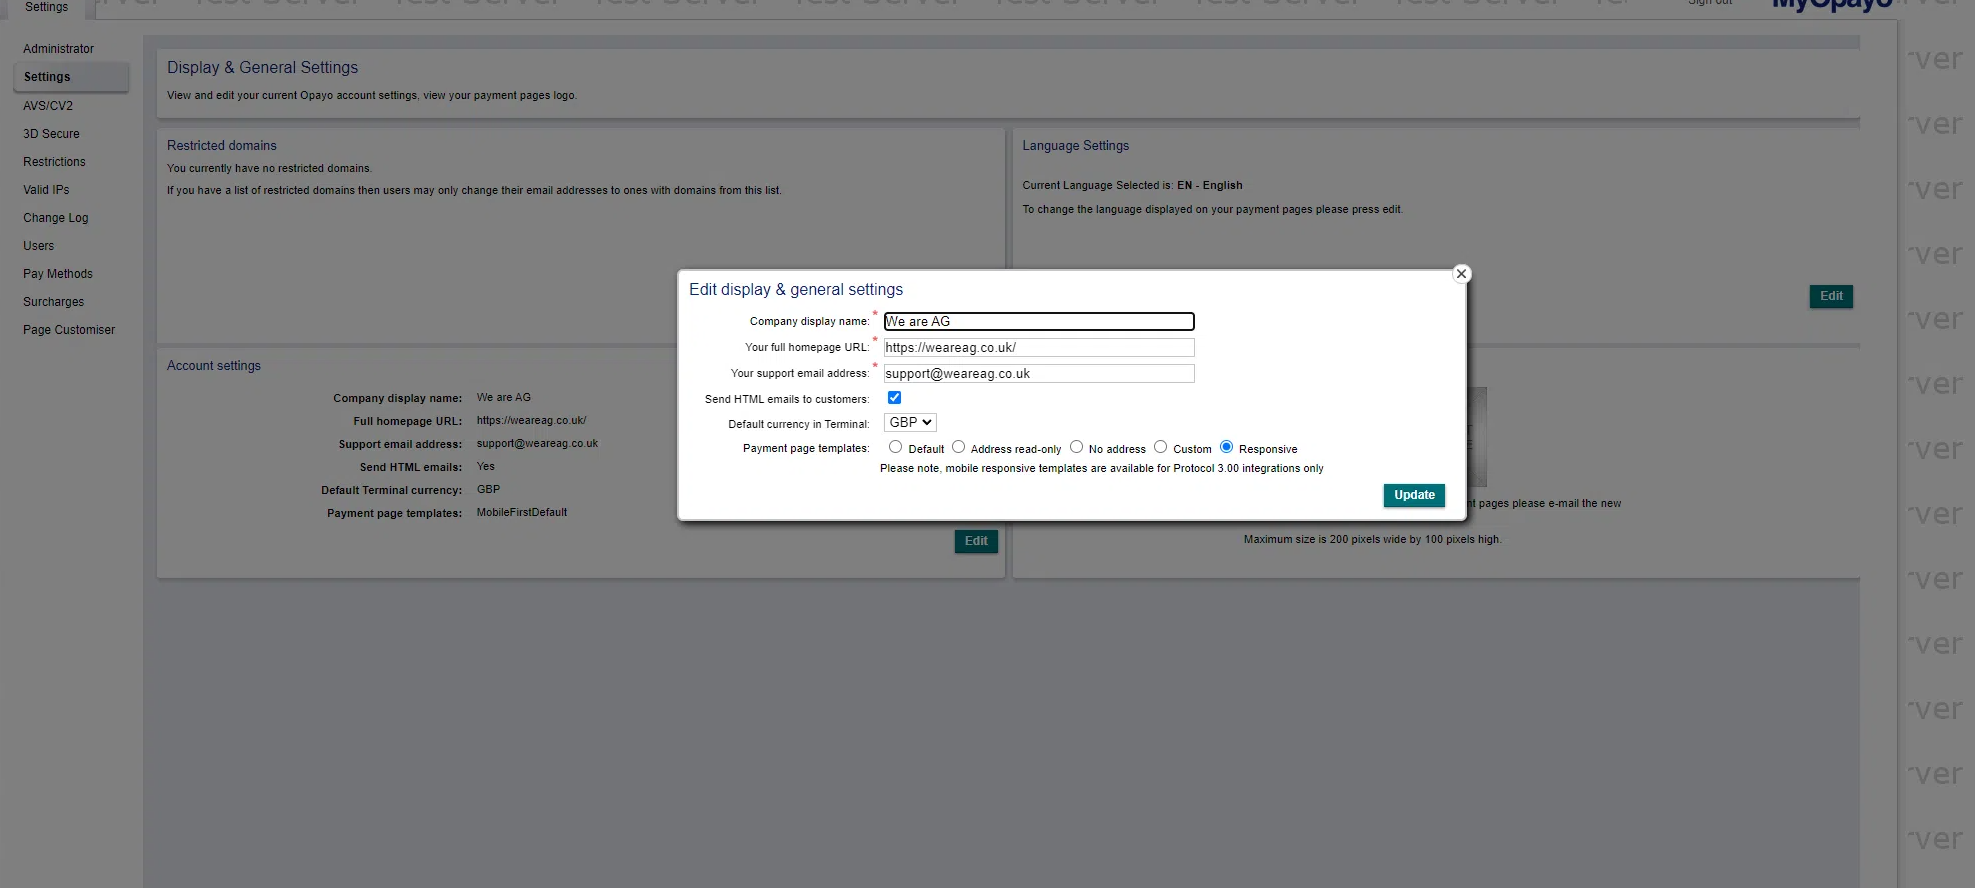
- Enter your Encryption Password. We’ve included a screenshot below to show you exactly where to find it in your MyOpayo account. Admin access is required to view it.
- Choose your transaction type.
You can select Authenticate for reserving funds for future payments or Payment for immediate fund transfers. - Perform a test payment to confirm the setup is working correctly.
Setting Up the Direct Integration
Direct option is set up in almost the same way as the Server setup. The only extra steps are entering your Vendor Password and Encryption Password.
- Go to WooCommerce > Settings > Payments > AG Opayo Direct > Manage. This will open the plugin settings page.

- Enter your Vendor Name, Vendor Password, and Encryption Password.
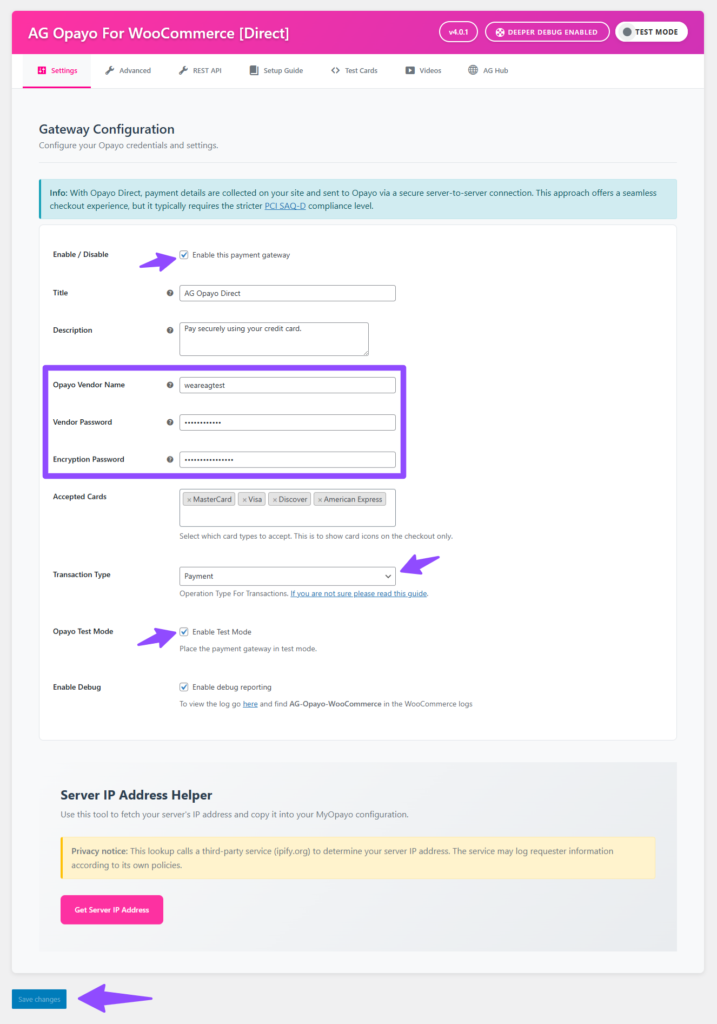
- Select your desired Transaction Type: Authenticate, use for future payments, such as reservations or Payment use for immediate transfers after authorisation, typically for online sales.
- Enable Test Mode.
- Log in to your My Opayo test account.
- Whitelist your server’s IP address (as you did in the Server Integration).
Note: If you’ve already done this, there’s no need to repeat it. Avoid duplicating entries in the Opayo backend, but do ensure this step is completed.
- Finally, run a test payment to confirm everything is functioning correctly on your site.

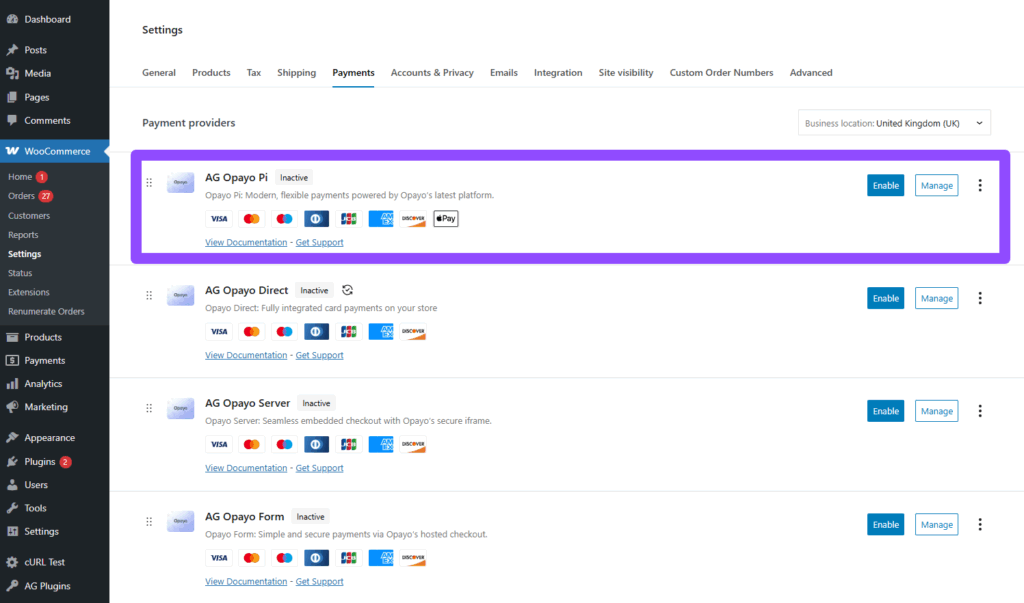
Setting Up the PI Integration
Last but not least, our latest addition to the Opayo plugin introduces wallet payment support, including Apple Pay and soon Google Pay. It’s currently in beta, with ongoing development for new features and improvements.
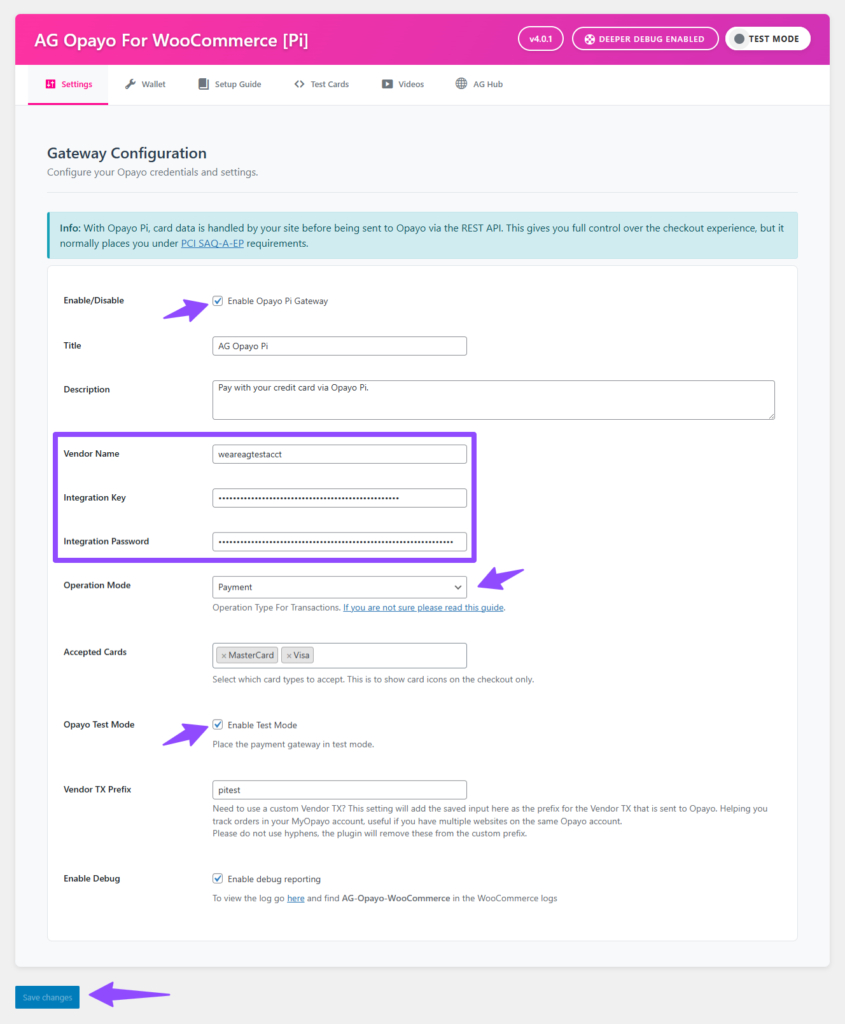
- Navigate to WooCommerce > Settings > Payments > AG Opayo Pi > Manage. This will take you to the Plugin Settings page.
- Enter Vendor Name.
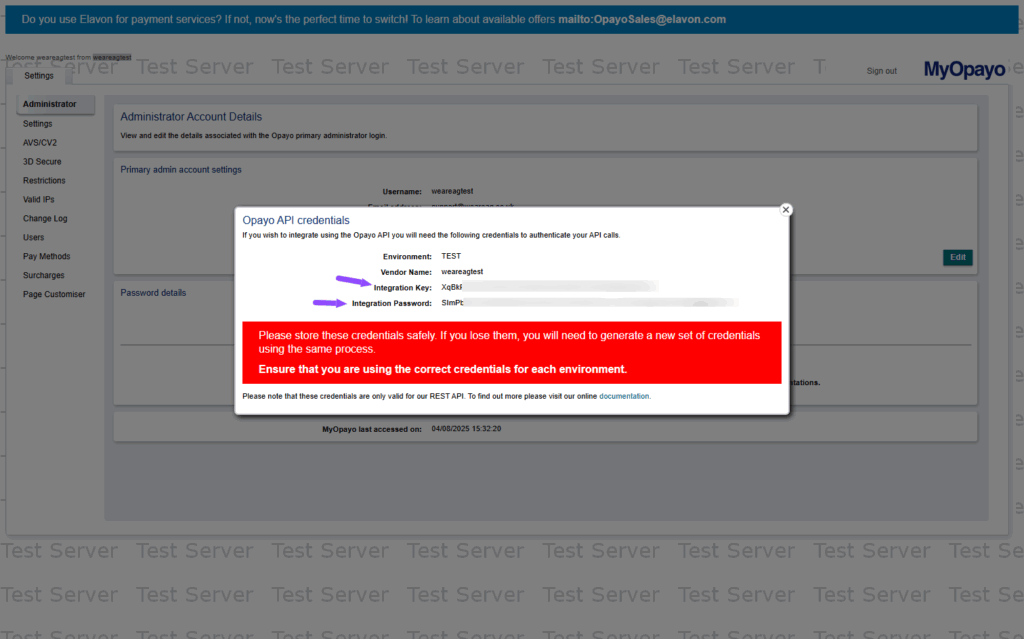
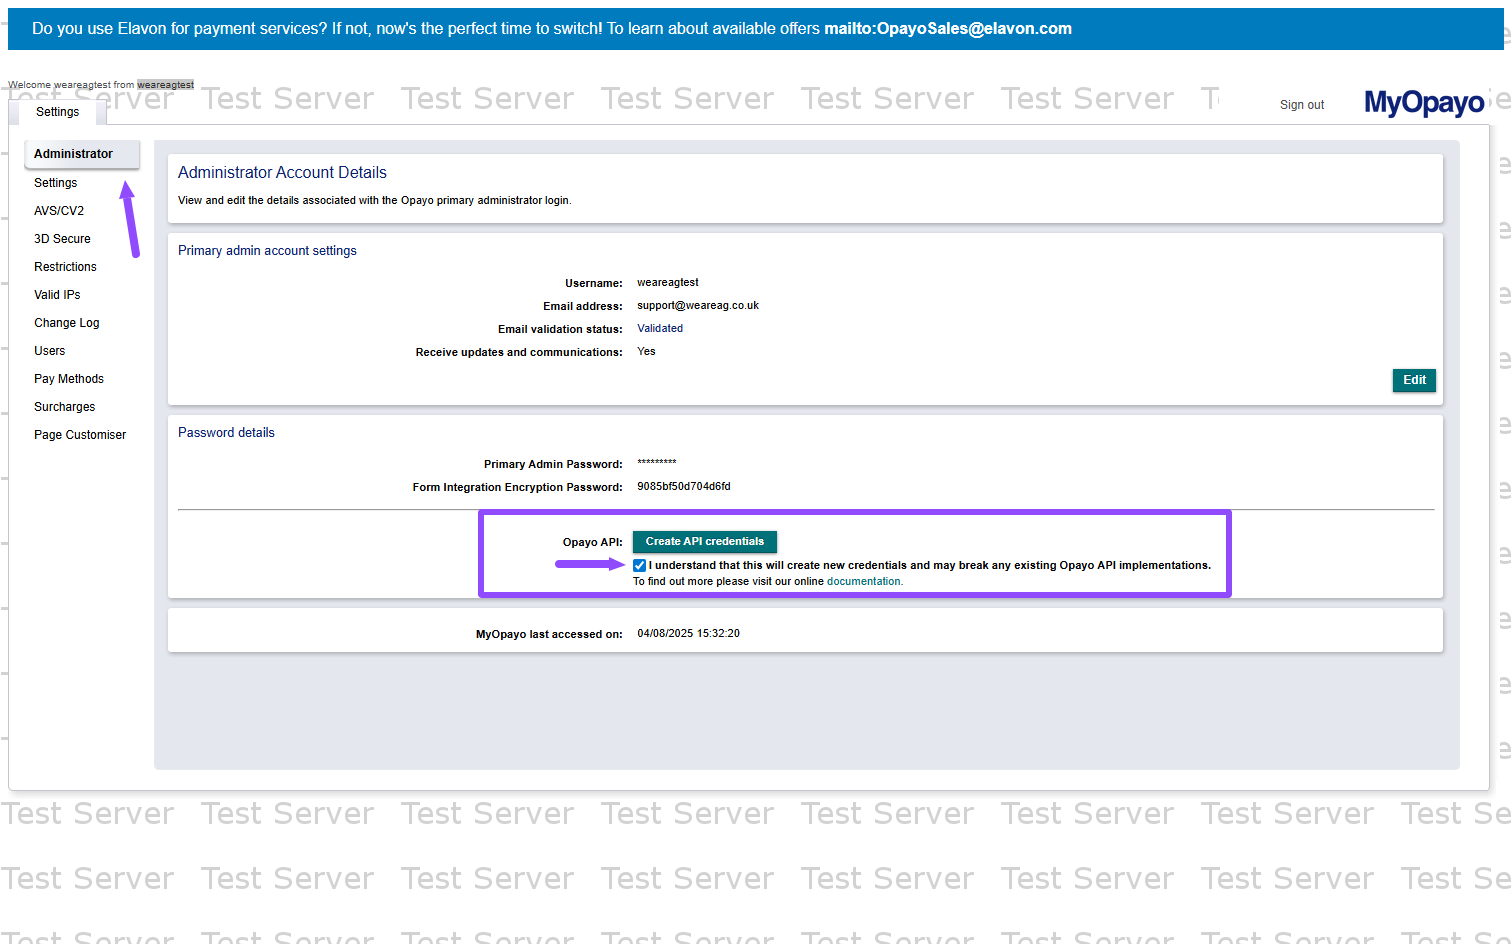
- Add Integration Key and Password. You can generate it inside your MyOpayo account, if you don’t have it yet, follow through the screenshots below for guidance.
- Log in to your MyOpayo account.

- On the Administrator tab > Click Create API Credentials “green button”.
- Copy and save the Integration credentials securely for future reference.
- Select Operation Mode: You can select Authenticate for reserving funds for future payments or Payment for immediate fund transfers.
- Enable Test Mode and Save the changes.
- Do a test payment to make sure everything works.


Customizing Your Payment Page Design
Opayo allows you to customize the design of your payment page to match your brand’s look and feel. To customize the page:
- Go to the Settings tab in your Opayo back office.
- Under Account Settings, click Edit to view available customization options.
- Customize the template’s colours and design to match your store’s branding.
For a more unique design:
- Select the Custom Template option to apply a bespoke design.
- You’ll need to download the template files and work with your developer to customise these templates.
Final Step: Testing
Before switching to the live environment, thoroughly test your setup by performing multiple test transactions. Testing ensures everything is configured correctly and catches any potential issues.
- Use Opayo’s Test Environment for these simulations.
- Review the error logs if needed and troubleshoot any issues.
- Once you’re confident that everything works properly, Go Live, Disable Test Mode and Save your settings.
Friendly reminder: Don’t forget to use your live account credentials. Test and Live are two separate account.
Troubleshooting & Support
If you encounter any issues during the setup process:
- Refer to the troubleshooting guide provided in the plugin documentation.
- Contact our support team for direct assistance. We’re committed to making your Opayo Payment Gateway integration smooth and seamless.
By following these steps, you’ll ensure a successful and secure payment gateway setup for your WooCommerce store. Happy selling!
Was this helpful?

Opayo
Still need help?
Our team are on hand to provide fast, helpful and professional support.
Back End Demo
Start exploring our fully functional demo site today.
Gain exclusive admin access to see what's possible.