Setup – Worldline
Welcome to the setup guide.
Getting this plugin setup will only take around 30 mins; this guide will be broken down into steps. You must first do a test transaction using the test Worldline account.
It is always best practice when setting up a payment gateway to do this in test mode first and run several orders before switching to live mode. You can check out our guide from this link regarding how you can proceed in creating a test account for Worldline.
Getting Ready
Before diving in, make sure you have:
- An active Worldline merchant account. Don’t have one yet? Get in touch with Worldline to set it up.
- Access to the backend of your WooCommerce website.
Step 1 – Plugin settings.
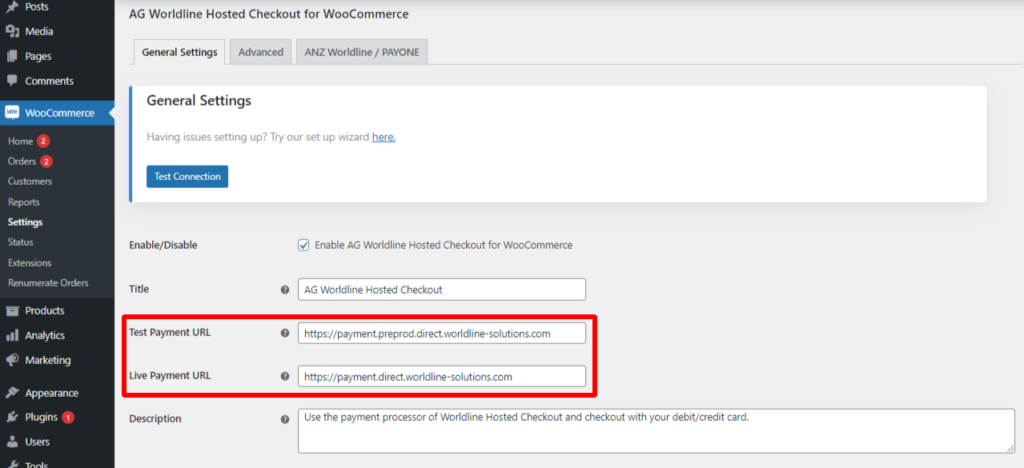
Install the plugin & activate the license key; once this is done, you want to navigate to the plugin settings page; which can be found in the WooCommerce settings:
The key items here for the setup are PSPID/ Merchant ID, API Key, and API Secret.

You will also need to set the Test Payment URL, and the Live Payment URL from here. Here are the general URLs:
Test Payment URL – https://payment.preprod.direct.worldline-solutions.com/
Live Payment URL – https://payment.direct.worldline-solutions.com/
These settings will need to be matched with what you generated from the Worldline back office.
Step 2 – Signing up, and Logging in to the test Worldline back office.
As of June 6, 2023, merchants/you can now proceed in directly signing up for a Worldline test account here.
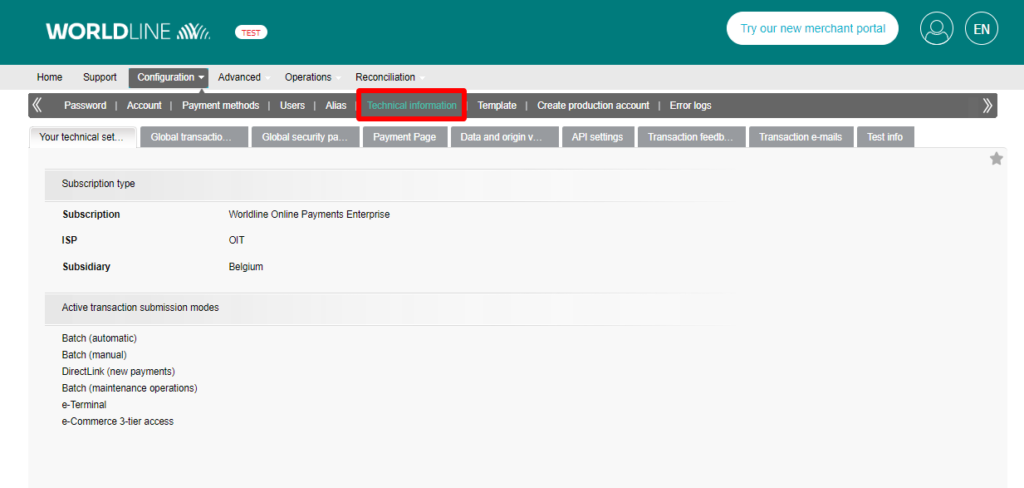
Once you have your test account, the next set of items is done in the Worldline back office; you can log in to the test account here. Once logged in, you need to navigate to the technical settings area. It is important to note that whatever changes to make in the test account, you must match in the live account.
From this area, we have access to all the sections we need to change/edit.
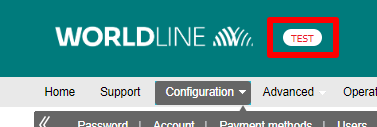
How to know if you are using the Worldline test account? When you have logged in, look at the Worldline logo. To the right of it, you will see TEST in red like this:
Once you want to go live, create a production account or contact the Worldline support team about it, here.
Step 3 – Global transaction parameters.
In this section, you need to decide which operation mode you want to run the payment gateway.
 Based on these two steps, you can choose between two default operation codes:
- Authorization: our system will only ask for authorization to have the authorization and data capture (payment request) steps performed separately at different times (the money remains in the customer’s account until a data capture (payment request) has been performed).
- Sale: our system automatically requests the payment (transfer of the amount) immediately after a successful authorization. This procedure is often used for goods/services delivered online.
Step 4 – Generating API Key and Secret
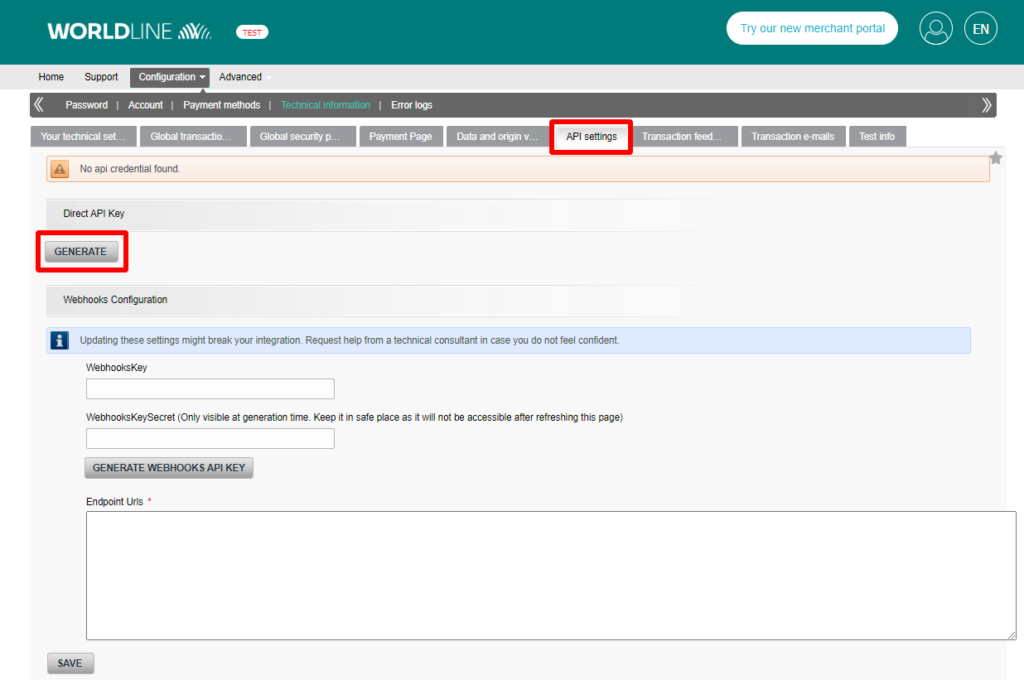
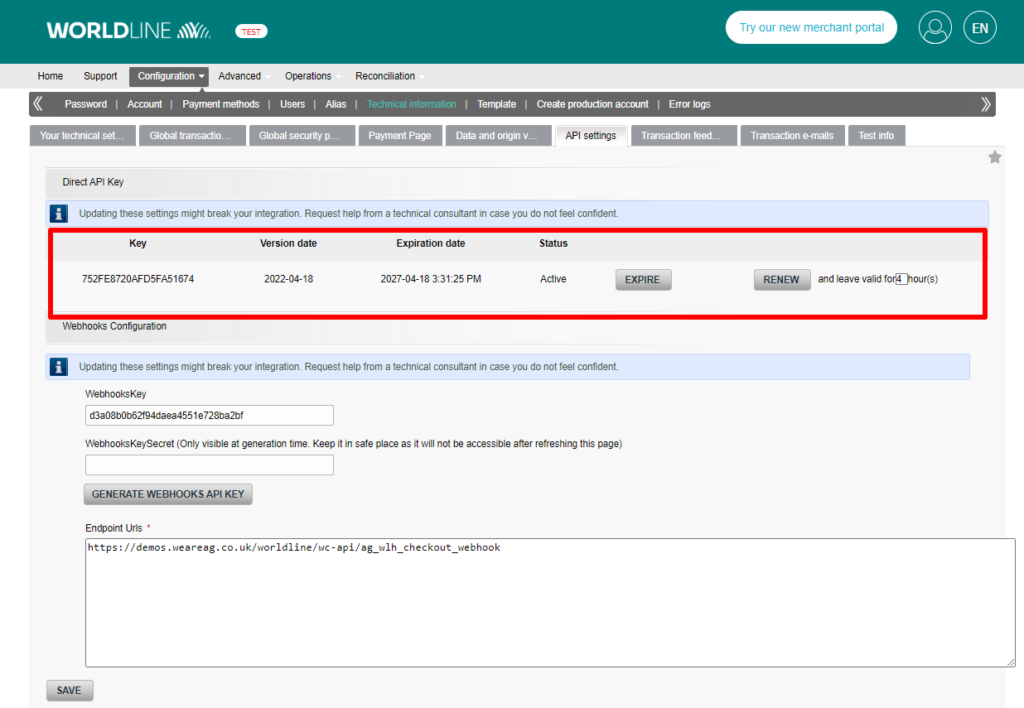
You will have to generate your API key and secret from the Worldline back office. Particularly, in Configuration > Technical Information > Ingenico Direct Settings. These will be used in the plugin’s settings.
Once the API key and secret are generated, copy the information and proceed to your WooCommerce > Settings > Payments > Hosted Checkout for WooCommerce to paste them, save your settings and proceed to the next step.
Step 5 – Test, Test & test.
Well done, you have now finished the setup of the plugin! Now, the important thing to do is test the payment gateway a few times before going live.
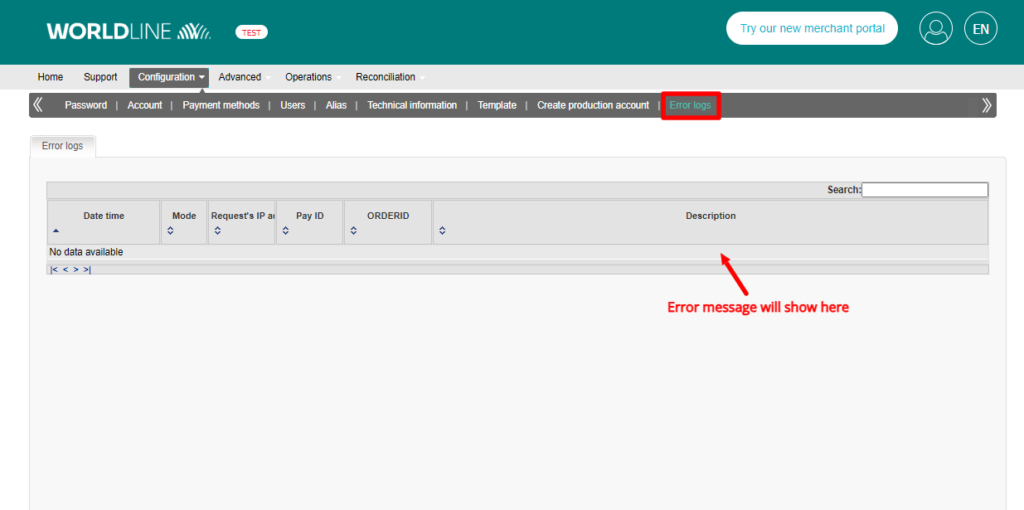
If you have any errors/issues, you first want to check the Worldline error log section.
In the description field, you will most likely find an error code, something like unknown order/1/r. If you do, you can have a look here at the troubleshooting error codes. There you will find out what the issue is and what is needed to fix it.
If you are still having issues, then enable the plugin debug log in the settings.

Run some test transactions, and if the plugin finds something wrong with the plugin setup, it will log this and tell you how to fix this; you can find the log by going here:

Here we can see the log saying that the transaction is confirmed, and no issues found.
We also added a button that could let you test the API details with one click. This button is located in WooCommerce > Settings > Payments > AG Worldline Hosted Checkout for WooCommerce and is labeled as “Test Connection”.
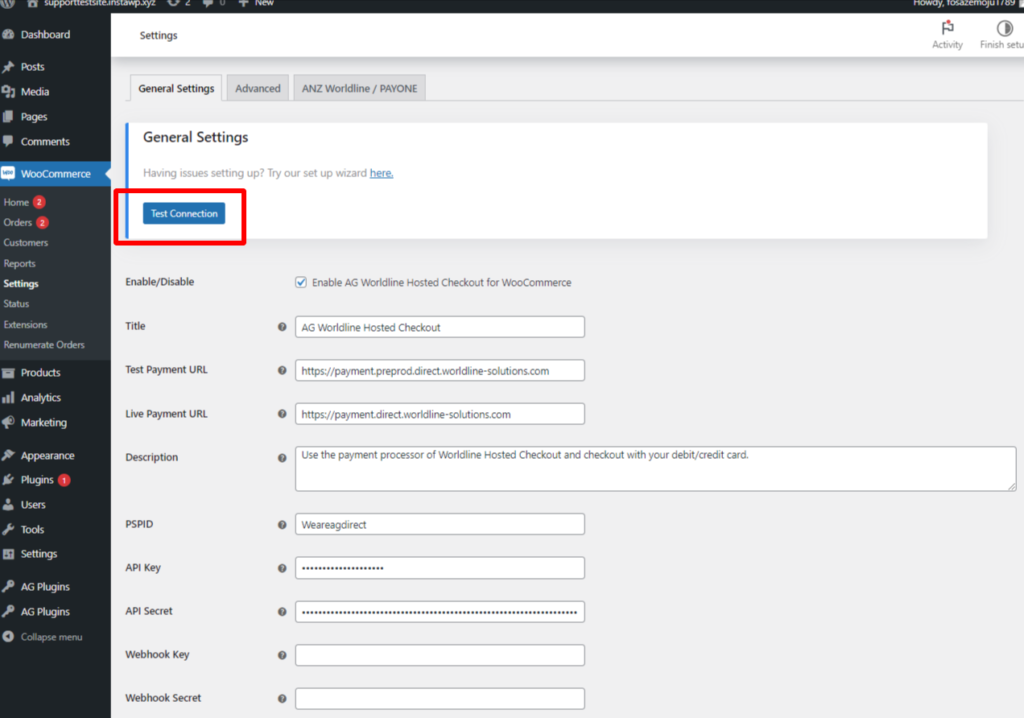
We still recommend proceeding with the test payments, but this button should be very useful for a quick test as well.
If you still face issues, then send a support ticket, and we will have a look for you.
Please be ready to send screenshots of the plugin & Worldline settings and the debug log.
Was this helpful?


Worldline Hosted Checkout
Still need help?
Our team are on hand to provide fast, helpful and professional support.
Back End Demo
Start exploring our fully functional demo site today.
Gain exclusive admin access to see what's possible.
