Setup guide
Welcome to the setup guide.
Getting this plugin setup will only take around 30 mins; this guide will be broken down into steps. You must first do a test transaction using the test Viveum account. The Viveum team will supply you with two logins, one for test and the other for live. You can get to both the test and live logins from here.
It is always best practice when setting up a payment gateway to do this in test mode first and run several orders before switching to live mode.
Getting Ready
Before diving in, make sure you have:
- An active Viveum Multipay merchant account. Don’t have one yet? Get in touch with Viveum to set it up.
- Access to the backend of your WooCommerce website.
Step 1 – Plugin settings.
Install the plugin & activate the license key; once this is done, you want to navigate to the plugin settings page; which can be found in the WooCommerce settings:
The essential items here for the setup are PSPID, SHA-IN, SHA-OUT & SHA encryption methods.
 These settings will need to be matched with what you enter in the Viveum back office.
Step 2 – Login to the test Viveum back office.
The next set of items is done in the Viveum back office; you can log in to the test account here. Once logged in, you need to navigate to the technical settings area. It is important to note that whatever changes to make in the test account, you must match in the live account.
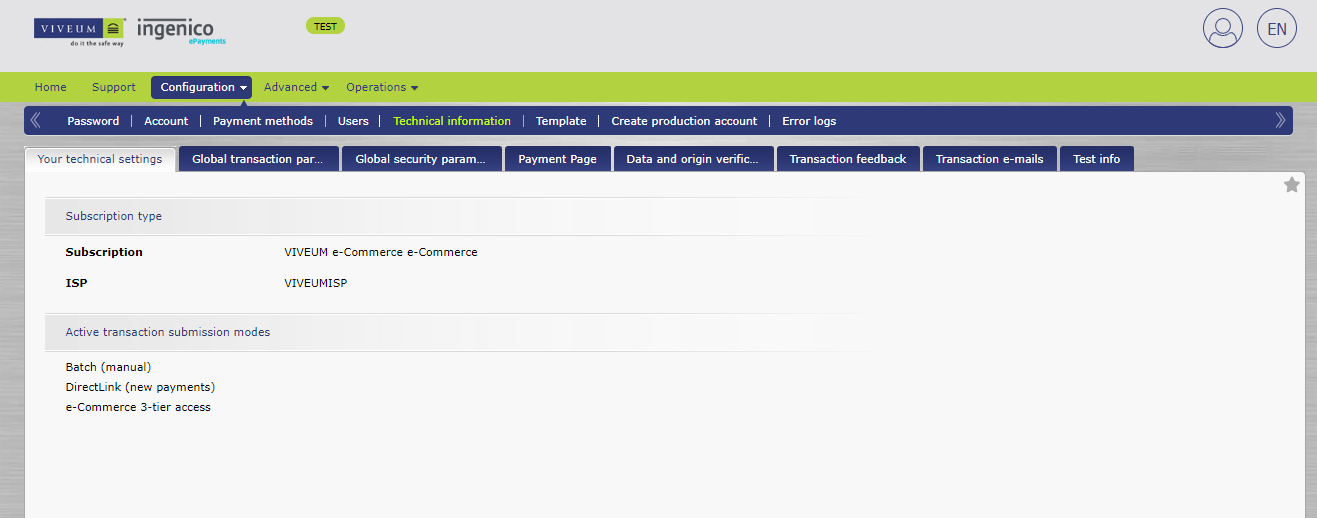 From this area, we have access to all the sections we need to change/edit.
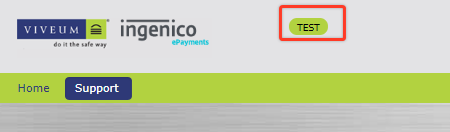
How to know if you are using the Viveum test account? When you have logged in, look at the Viveum logo. To the right of it, you will see TEST in red like this:
 If you don’t have access to the test account, you/your client will need to reach out to the Viveum team here: https://www.viveum.com/support/ and ask for logins again. It’s also important to note that if the Viveum account is new, you won’t be able to switch to live mode until you have done several test orders and applied to go live (You will see the option on the main Viveum Home screen).
Step 3 – Global transaction parameters.
In this section, you need to decide which operation mode you want to run the payment gateway.

Based on these two steps, you can choose between two default operation codes:
- Authorization: our system will only ask for authorization to have the authorization and data capture (payment request) steps performed separately at different times (the money remains in the customer’s account until a data capture (payment request) has been performed).
- Sale: our system automatically requests the payment (transfer of the amount) immediately after a successful authorization. This procedure is often used for goods/services delivered online.
Step 4 – Global security parameters.
In this section, we pick and match the SHA encryption method we set in the plugin settings.

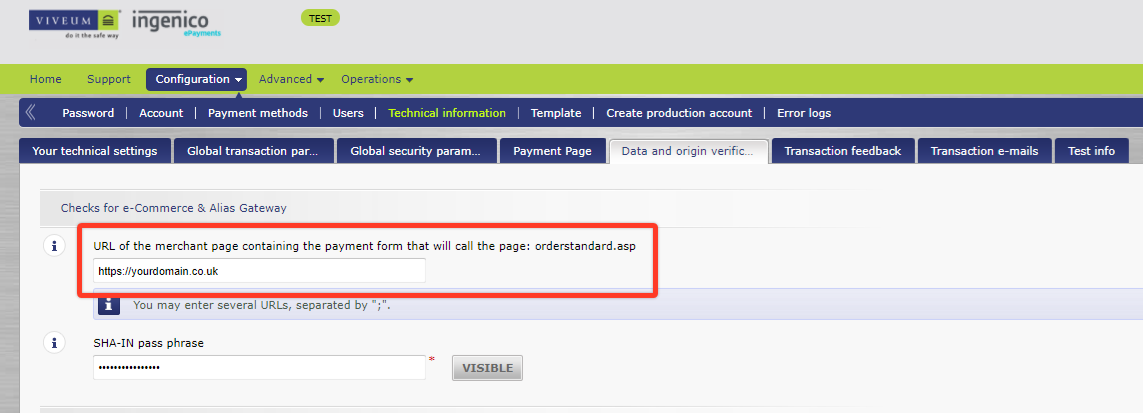
Step 5 – Data and origin verification.
We have two items to set/change in this section. The first item is setting the payment page URL; this is the last URL on the website before the customer is sent to the Viveum servers to make the payment; it normally looks like the following.
Change the domain to match your website address; without this set correctly, the payment gateway will not work. It is possible to have multiple domains/websites in this field also. Add a; between the URL’s as shown.
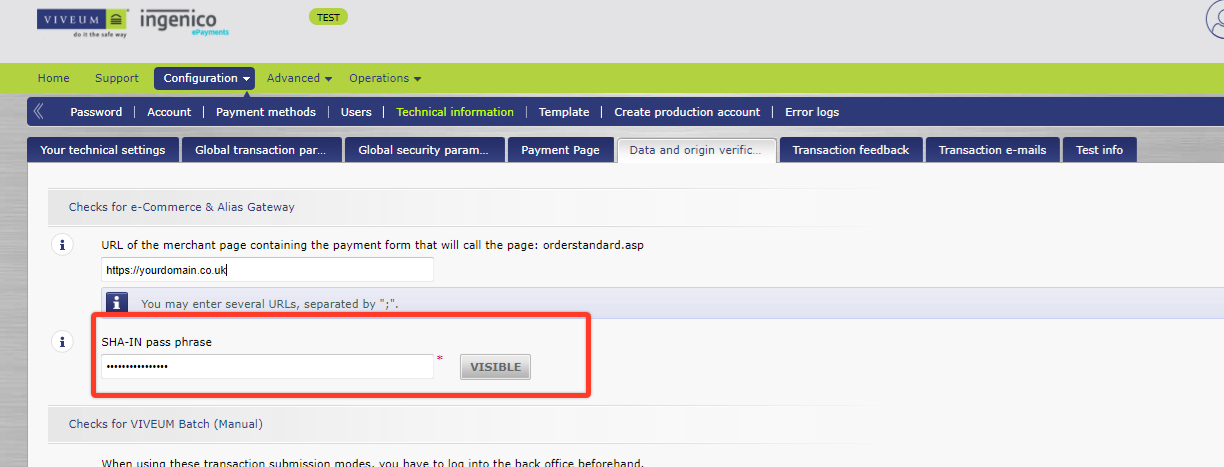
The next item here is the SHA-IN; this must match what you have in the plugin settings. We recommend that you use letters and numbers only in this setting and that it has a maximum of 16 characters.
Step 6 – Transaction feedback.
Again, in this section, we have only two items. The first one is to make sure that the tick box labeled “I would like to receive transaction feedback parameters on the redirection URLs.” is ticked.

Without this ticked, the Viveum system won’t send data back to the website. This means you will get orders with pending payment and then fail. This is an important setting.
The next item here is the SHA-OUT; you will need to scroll down a little to see the option.

Again, this must match what you have set in the plugin settings; we recommend that you use letters, and numbers, and it should also have a maximum of 16 characters.
The final item here is the parameters, which will be sent back to the website.

You only want the following in the selected section:
ACCEPTANCE
AMOUNT
BRAND
CARDNO
CN
COMPLUS
CURRENCY
ECI
ED
IP
NCERROR
ORDERID
PAYID
PAYIDSUB
PM
STATUS
TRXDATE
Step 7 – 3D Secure.
This is very important if you sell products to EU customers. From 14 September 2019, all EU (Brexit has no effect on this) credit card transactions could be rejected if your store does not have 3D secure setup.
With the enforcement of the Strong Customer Authentication (SCA) & Payment Services Directive (PSD), it is important to get the Viveum back-office set up and ready. Thankfully this is quite simple. Navigate to
And you will see something like the following:

The key here is to ensure that 3D secure is active on the card brands you wish to use on the website.
Step 8 – Test, Test & test.
Well done, you have now finished the setup of the plugin! Now the important thing to do is test the payment gateway a few times before going live.
If you have any errors/issues, you first want to check the Viveum error log section.

In the description field, you will most likely find an error code, something like unknown order/1/r. If you do, you can have a look here at the troubleshooting error codes. There you will find out what the issues are and what is needed to fix them.
If you are still having issues, then enable the plugin to debug and log in to the settings.
Run some test transactions, and if the plugin finds something wrong with the plugin setup, it will log this and tell you how to fix this. You can find the log by going here:

Here we can see the log saying that the transaction is confirmed, and no issues found.
If you still face issues, then send a support ticket, and we will have a look for you.
Please be ready to send screenshots of the plugin & Viveum settings, and the debug log.
Was this helpful?