How To Force WooCommerce Shipping To The Customer Billing Address
Utilise WooCommerce’s built-in settings to streamline the checkout process by automatically setting the shipping address to match the customer’s billing address. Here’s how to activate this feature:
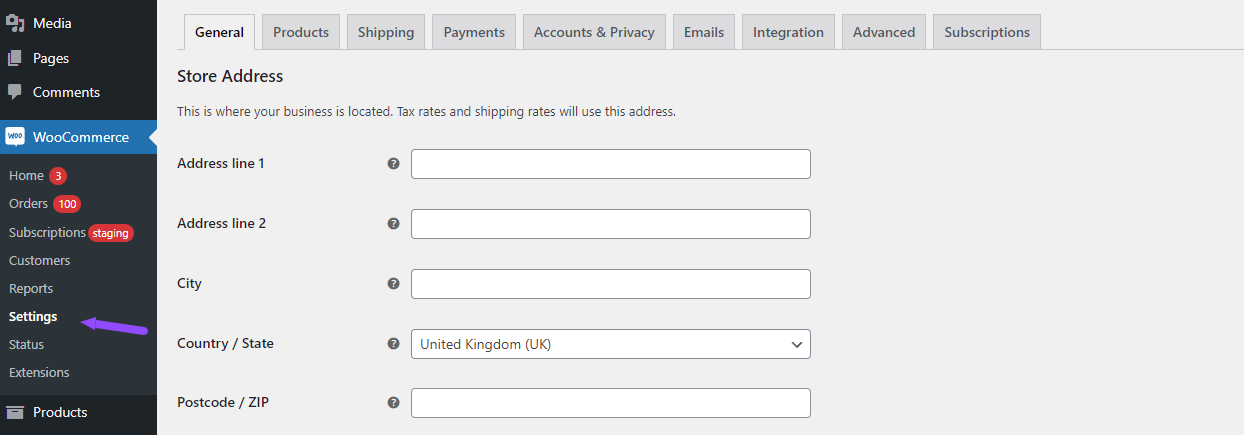
Step 1: Access WooCommerce Settings
- Go to Settings: From your WordPress dashboard, navigate to
WooCommerce » Settings.
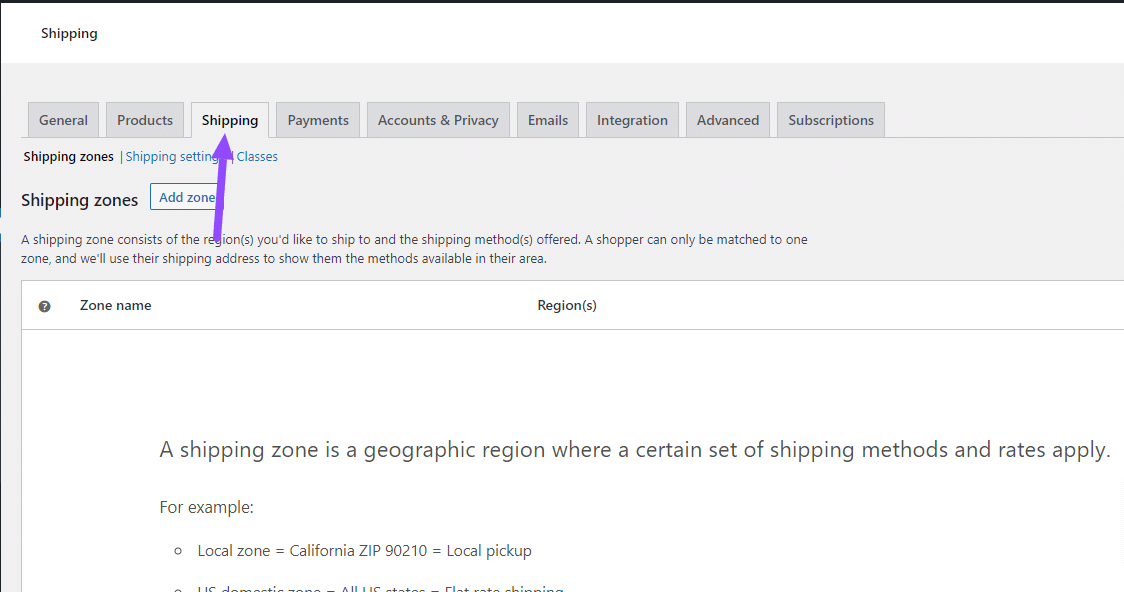
Step 2: Open the Shipping Tab
- Find Shipping Settings: Within the WooCommerce settings panel, select the
Shippingtab located in the top navigation bar.
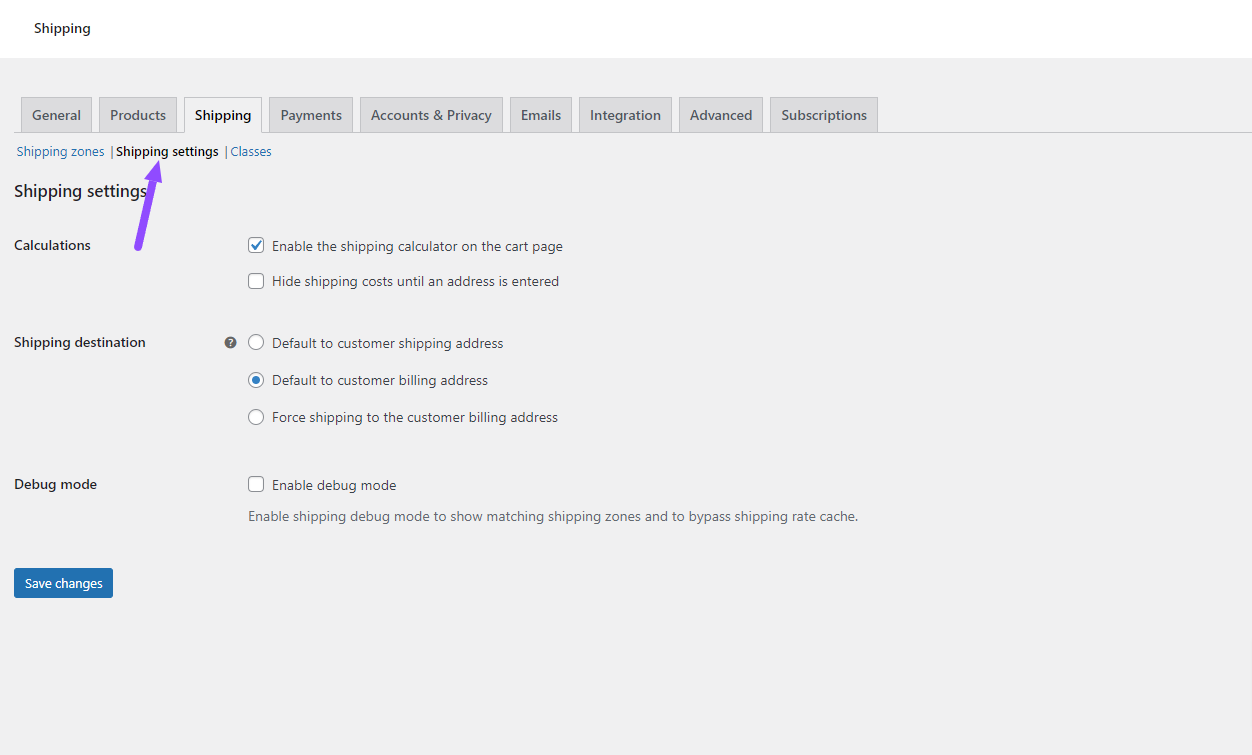
Step 3: Modify Shipping Options
- Adjust Shipping Preferences: Click on
Shipping settingsto access the settings where you can adjust shipping policies.
Step 4: Activate Shipping to Billing Address
- Set Shipping Destination: In the “Shipping Destination” section, choose the option for
Force Shipping to Customer Billing Address. - Save Your Changes: Ensure to click the
Save Changesbutton to apply and retain your updated settings.
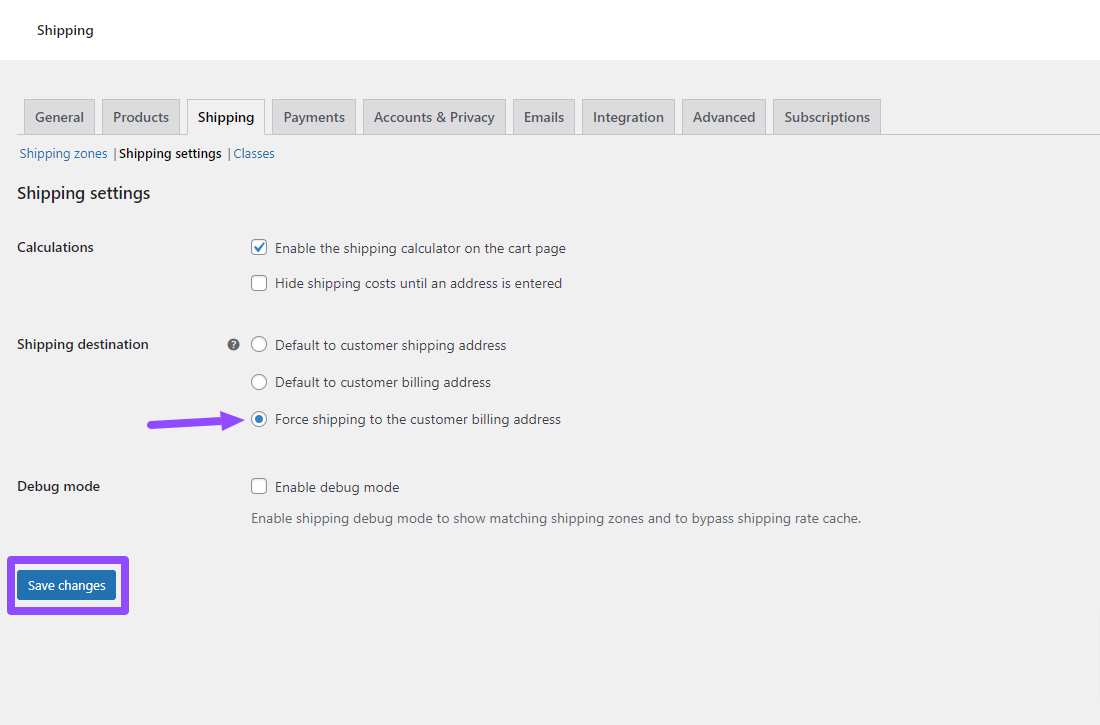
By following these steps, the shipping address field is effectively removed from the checkout process, simplifying it for your customers. This adjustment allows for a more streamlined checkout, reducing potential confusion and enhancing the overall user experience.
Was this helpful?