How it works
This is what happens when your customer or client makes a purchase or payment on your website.
Step 1
The customer adds items to their basket and goes to the checkout.


Step 2
The customer fills up his personal information and selects the Ingenico payment option.

Note: The above screenshot shows how the Ingenico checkout looks like when the test mode is enabled in the plugin. The test mode labels will not be visible if you disable the test mode from the plugin settings. You can use the test cards mentioned on the checkout for testing a transaction, or you can take a look at the test cards available here.
Clicking the place order button will redirect the customer to the Ingenico servers.
Step 3
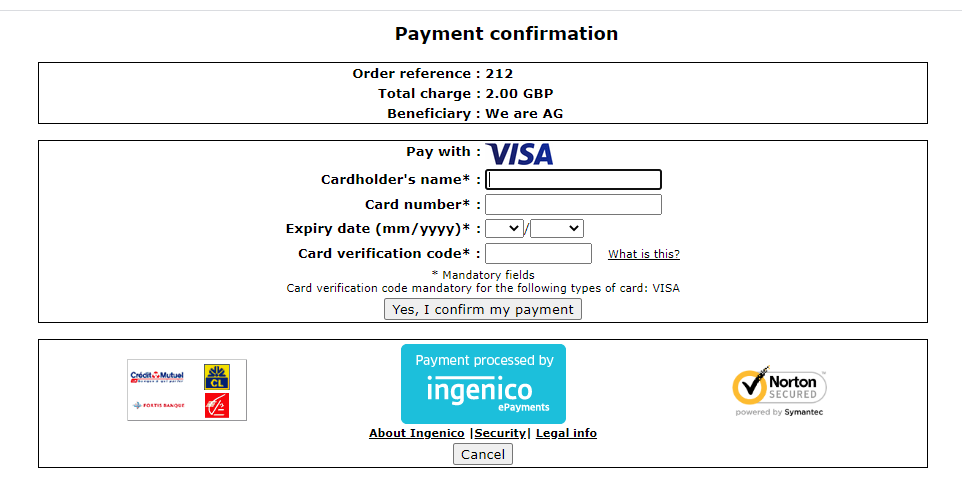
You will see the default Ingenico checkout template where you will enter your credit card information. Clicking the “yes, I confirm my payment” button will make Ingenico put the transaction through the card check schemes and send it to the card issuer for fraud checks (i.e., 3D Secure).

Step 4
The Transaction Successful message is displayed to your customer so they know their payment has gone through.

Step 5
The transaction is complete, and in a matter of seconds, they are redirected back to your website.

Was this helpful?


Ingenico Ogone ePayments
Still need help?
Our team are on hand to provide fast, helpful and professional support.