Ways to update We are AG plugins
It’s important to always keep your plugins up to date as it includes the latest features and bug fixes. Here are the different ways that you can do so: We recommend ensuring that you have a backup of your site before you do the update for safety measures. See – How to update plugins and themes.
Traditional – WordPress plugin dashboard
If you’d like to check if there are available updates for our We are AG plugins, you can check this from your WordPress admin dashboard > plugins > look for the We are AG plugin > and click the update now an option as seen from the image below:

Via the Account Details section
You can also install the update by navigating from your WordPress admin dashboard > AG Plugins > Account and click Install Update Now [Latest plugin version] as seen below:
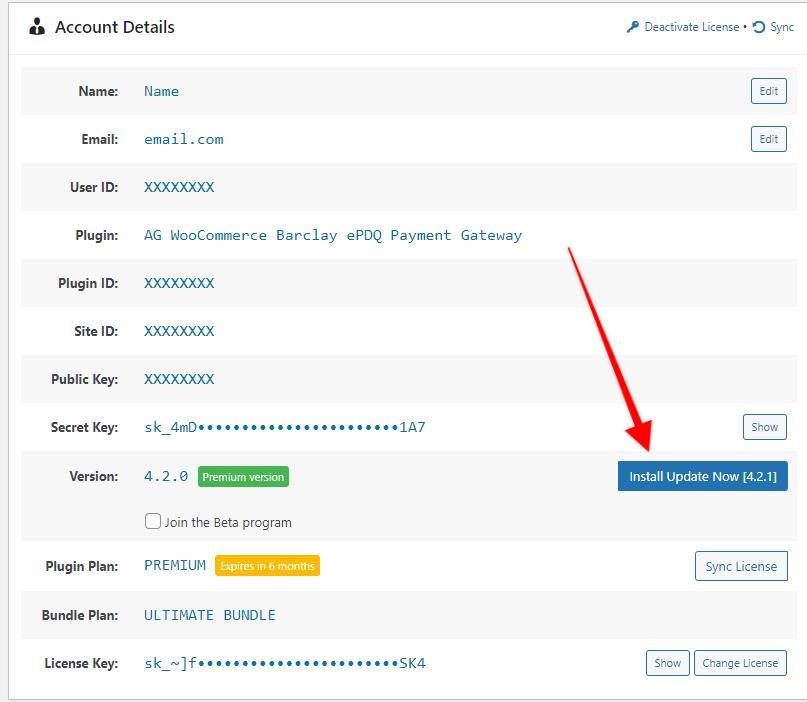
Checking for plugin updates
If there are no update notices appearing from your plugin dashboard and your account details section, you’ll have to navigate from your WordPress admin dashboard > AG Plugins > Account and click Sync License to double-check.
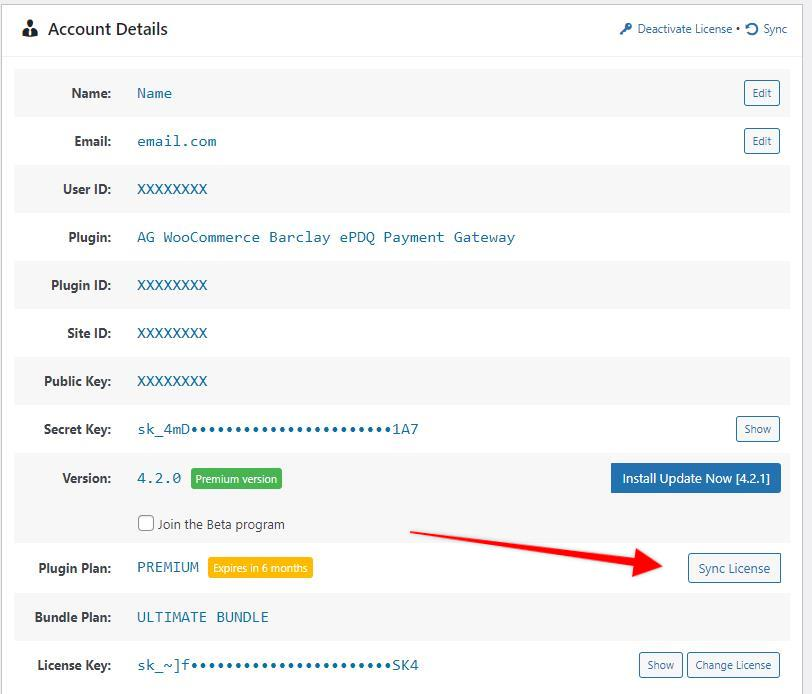
Re-installing the We are AG plugin
If you cannot see the update prompt from the plugin dashboard, you may need to manually update the plugin.
You have to first download the latest version of your We are AG plugin from your We are AG account here – https://weareag.co.uk/account/#!/downloads
 Once you have downloaded the latest version, navigate back to your WordPress admin dashboard > plugins > add new > upload the plugin > choose the downloaded plugin version and click Install Now.
 It will detect that the plugin already exists then you’ll have to click Replace current with uploaded so that it overwrites the currently installed plugin version.
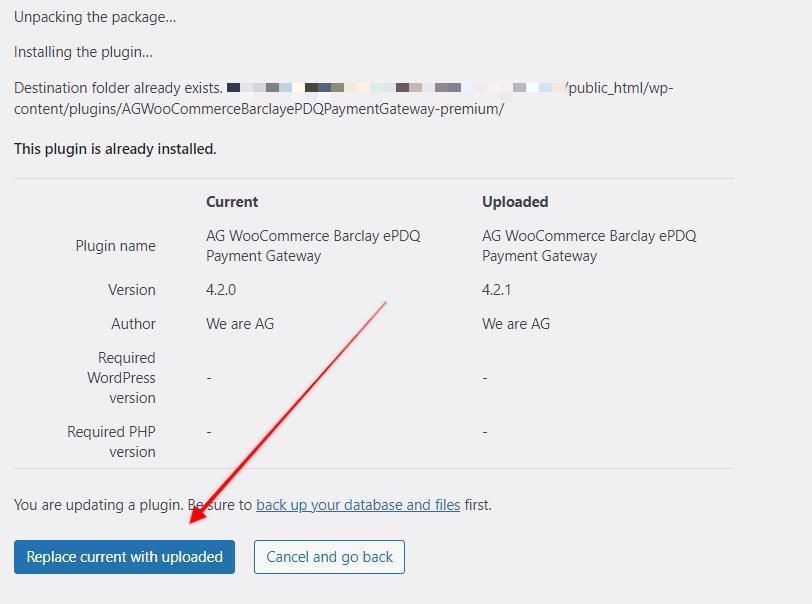
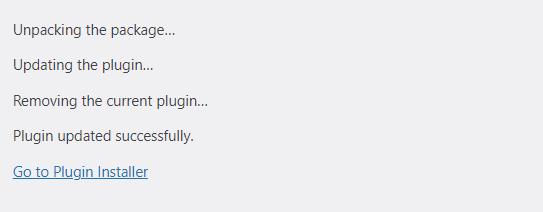
Updating the plugin via an FTP client
For this method, we’ll have to install the plugin files to your WordPress plugin folder and we can do so by using FTP.
You’ll have to first download the latest version of your We are AG plugin from your We are AG account here – https://weareag.co.uk/account/#!/downloads

Once you have downloaded the plugin, the next thing to do is to “extract” the files as the plugin is compressed in a .zip file, you’ll have to install software like Winrar to do this.
Usually, you’ll have to right-click on the zip file and click the extract all option.
After being extracted, it will display a folder. The folder title will differ depending on the plugin that you are using.
 The next step is to upload this folder to your server.
FTP stands for file transfer protocol and in the simplest form, you can think of this as the method to transfer files to your server where your website files are located.
You can use software like Filezilla (an FTP client) in order to transfer files to your server.
For the FTP client to “know” where the server is, you’ll have to get your FTP login credentials (Host, Username, Password, and Port). If you are not sure where to get this information, you can reach out to your hosting provider and they’ll provide it to you.
Once you have these details, you can enter these on the FTP client and click Quick Connect. If it is successful, you’ll be seeing the message below:

You will now be seeing the folders that are from your site. You can then click the wp-content folder > plugins > and then look for the plugin folder similar to the folder title that you have extracted above.
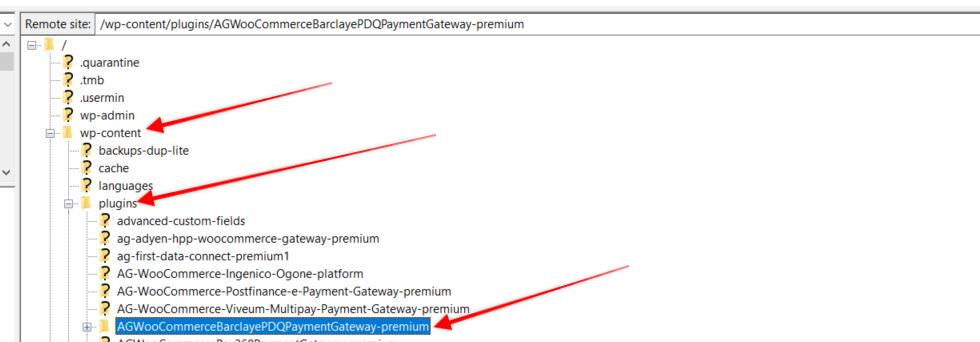 Select that specific folder right click then hit delete. Don’t worry as your changes made on the plugin won’t be removed.
After the plugin is removed, you’ll have to upload the extracted folder that you’ve downloaded earlier and place it on the plugins folder.
You can drag and drop the We are AG folder on the plugins folder.
Was this helpful?
Still need help?
Our team are on hand to provide fast, helpful and professional support.