Start here
Welcome to the setup guide.
Getting set up with our First Data Connect plugin takes around 20 mins; this guide will be broken down into steps.
Requesting your Test Account
With the First Data platform, there are two types of accounts – a Test account and a Live account.
It is recommended that you set up your site/staging site using a First Data Connect test account, and carry out some test transactions first.
You should request this when you set up your First Data Connect account. When you (the merchant) apply for your First Data Connect account, you’ll be assigned an account rep or contact – If you have not done this yet, please contact their support team at cloverukipgconnect@fiserv.com. You can ask them for a test store/account so that you can proceed in setting up the plugin with the test details they will provide, and test the buying process before you go live with your store.
The First Data Connect team will send you two emails for the test account, one with the Store ID and another with a Shared Secret for the connection. The test account (Store ID) provided by First Data will have the number “2054” after the first number.
Once you have done several test orders, you should set up the live First Data Connect account.
It is always best practice when setting up a payment gateway to do this in test mode first and run numerous orders. The will allow you to see the customer journey and catch any potential issues with your set-up.
Getting Ready
Before diving in, make sure you have:
- An active Fiserv/Clover UK merchant account. Don’t have one yet? Get in touch with Fiserv/Clover to set it up.
- Access to the backend of your WooCommerce website.
Step 1 – Plugin settings.
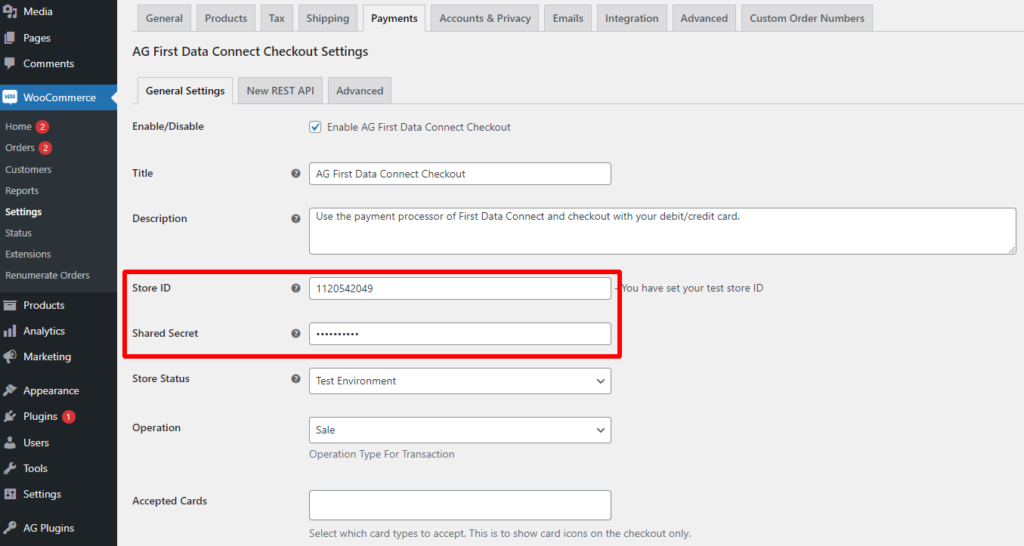
Install the plugin & activate the license key; once this is done, you want to navigate to the plugin settings page; which can be found in the WooCommerce settings:
The essential items here for the setup are Store ID & Shared Secret.
Both these details are supplied by the First Data Connect team when you sign up for an account.
Step 2 – Setting the operation mode for the payment gateway
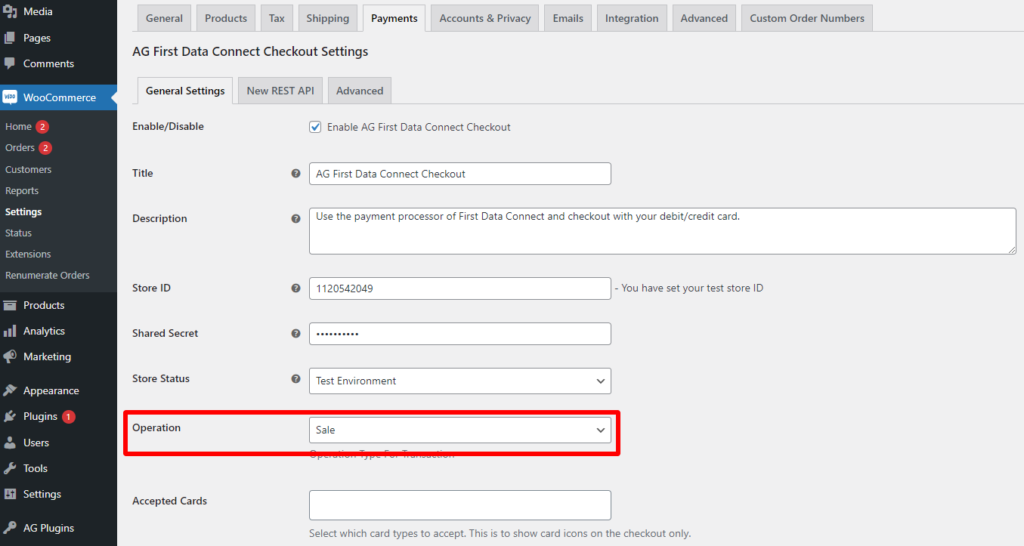
In this section, you will need to decide which operation mode you want to run the payment gateway. You will be able to set this option from the WordPress dashboard >>WooCommerce >> Settings >> Payments >> AG First Data Connect Checkout Settings.
Based on these two steps, you can choose between two default operation codes:
Pre-authorization: our system will only ask for authorization to have the authorization and data capture (payment request) steps performed separately at different times (the money remains in the customer’s account until a data capture (payment request) has been performed).
Sale: our system automatically requests the payment (transfer of the amount) immediately after a successful authorization. This procedure is often used for goods/services delivered online.
Step 3 – Double-check the online store URL Settings
The third step is to log in to your First Data back office using the test account credentials provided to you by the First Data team.
Proceed to Customization >> Define the URLs for the integration with your online store.

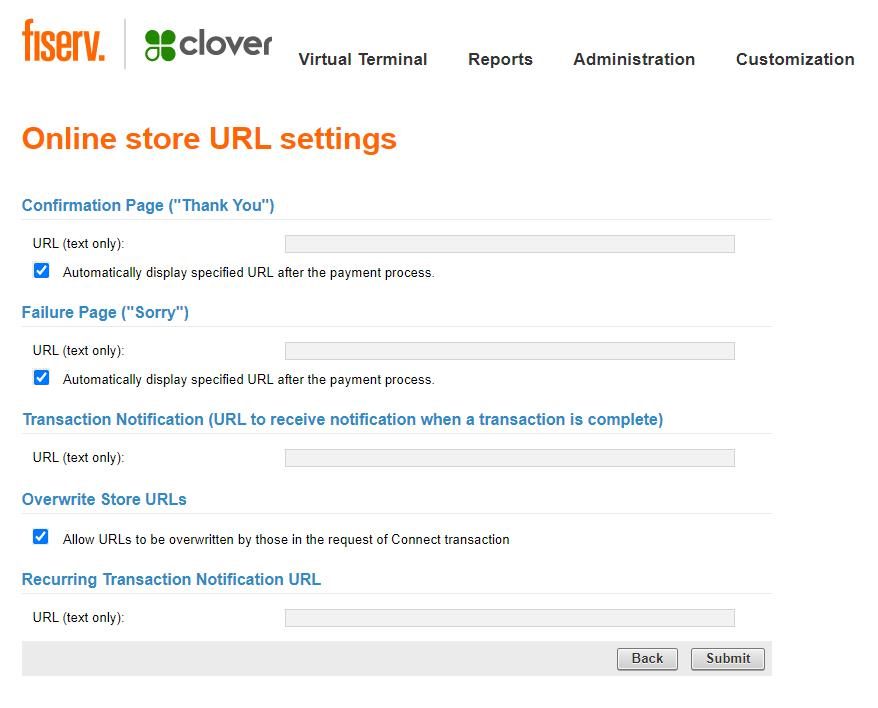
From here, please ensure that the “Overwrite Store URLs”, and “Automatically display specified URL after the payment process.” checkboxes are ticked, while the input fields for the URLs are blank as the plugin already sets them from the background process automatically.

This way, all checkout process redirections should be error-free.
Step 4 – Test, Test & test.
Well done, you have now finished the setup of the plugin! Now the important thing to do is test the payment gateway a few times before going live. If you have any errors/issues, you first want to check the error log.
If you still face issues, then send a support ticket, and we will have a look for you.
Was this helpful?


First Data Connect
Still need help?
Our team are on hand to provide fast, helpful and professional support.

