How can I change to the responsive payment page
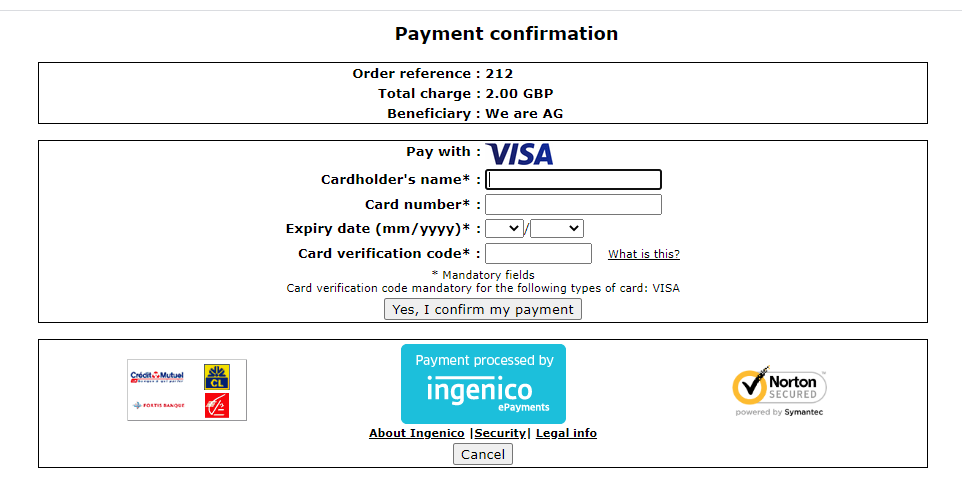
If you have checked our setup guide and went through with the checkout process, you can see the payment page like so:

If you’d like to change the payment page to the Responsive Payment page of Ingenico, here’s how you can do it:
Step 1
Kindly log in to your Ingenico BackOffice account and navigate from Configuration > Template
 Step 2
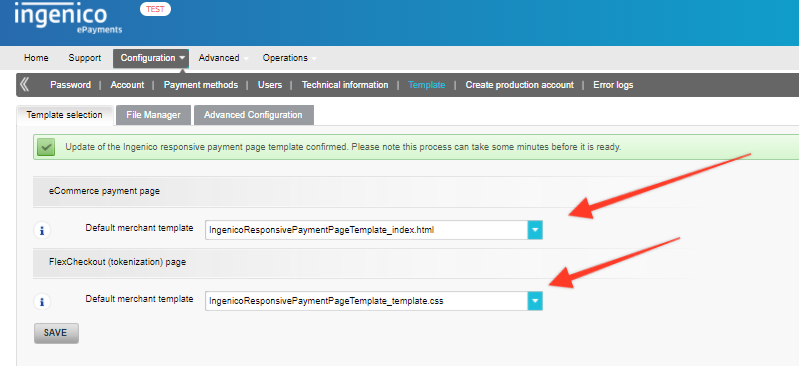
Within this section, there’s an option to ‘Activate’ a template, which essentially overlays the payment page.

As it is not activated, the template in the dropdown uses the standard template and not the responsive payment page.
Step 3
Once you have clicked activate, it will display the success message as seen below:

Once activated, the default merchant template had been changed to use the responsive page template. It would take a few minutes before the changes take effect, so I would take the chance to brew and sip a warm cup of coffee while waiting.
Step 4
Try and purchase a product from your store, and the payment page should be like this:

You’ll notice that the logo image on the upper left side of the page is broken. This responsive page template carries through a hard-coded value where the logo must be ‘logo.png’ and must be uploaded to the Ingenico back office. Any other format or naming convention being passed through would result in a broken image being displayed.
To learn more about this, you can check out Ingenico documentation here.
Step 5
To personalize the template by adding your logo, go to Configuration > Template > File Manager and upload your logo.

Note: Again, the file image format must be PNG, and the file name should be ” logo.”
Scroll down the page, and you will see the files uploaded to your Ingenico back office. It may take up to 30 minutes for the logo to be applied on your payment page as Ingenico’s security tool will be validating the file.

Once the logo had been validated:

Try and purchase a product from your store again, and the payment page should have a logo now.

Was this helpful?


Ingenico Ogone ePayments
Still need help?
Our team are on hand to provide fast, helpful and professional support.