Have you just built a new WooCommerce website? and is your preferred payment gateway Ingenico Ogone? Well you’re in luck as we have what you are looking for!
Our AG WooCommerce Ingenico Ogone Platform Gateway plugin was released last July 4th and it basically allows you to process payments using the Ingenico payment gateway for your WooCommerce website.
In this guide, we’ll be discussing the step-by step instructions for you to set this up as easy as possible. Additionally, we’ll talk about what Ingenico Ogone is and why you might want to use it in WooCommerce as your payment method of choice.
The plugin mentioned in this guide:
AG WooCommerce Ingenico Ogone Platform Gateway – Add a Ingenico Ogone payment gateway to your WooCommerce website with ease.
Want to head straight to the tutorial? Click here.
What is Ingenico Ogone?
Ingenico is an online payment solution that allows users to process card payments. This can be used to pay for bills, products, services provided that the platform that they are purchasing the item from supports it.
Similar to other online payment solutions an account with Ingenco is required to integrate it on your site. Ingenico charges you (as the account owner) per month for the service charge and for which plan you chose.
It is also possible that you might be charged per transaction as well.
Ingenico ePayments supports the world’s most popular payment methods like Visa, Mastercard, Paypal. For a list of supported payment methods, you can check it here.
With that being said, we now understand what Ingenico is as a service.
The next question that you might have is, “Why would you prefer this over other payment processors anyway?”
Why you might want to use Ingenico with WooCommerce instead of PayPal
Using PayPal might be a tempting prospect, but if you’re thinking about adding Ingenico, here are a few things to consider:
Ingenico rates are better
Paypal charges 4.4% transaction fee plus a fixed fee based on currency received as seen here – https://www.paypal.com/ph/webapps/mpp/paypal-seller-fees while Ingenico has better and cheaper rates. You can their plans as seen here – https://www.ingenico.co.uk/payments#go
Ingenico ensures the best security
The number one thing that you would need to know when dealing with payment solutions is security. As a website owner, it is your responsibility to ensure that customers can safely purchase your product and our plugin and Ingenico handles this for you.
With Ingenico and the AG WooCommerce Ingenico Ogone Platform Gateway plugin ensures no card data is stored locally on your server.
All sensitive card data is sent directly to Ingenico and 3D secure authentication adds an additional layer of security, guaranteeing fewer chargebacks or fraudulent transactions.
These are the benefits of using Ingenico, now let’s get to the good part of setting our plugin to work with your site:
How to set up Ingenico as a payment gateway in WooCommerce
AG WooCommerce Ingenico Ogone Platform Gateway allows you to take secure and fast payments on your WooCommerce store using Ingenico payment gateway.
This plugin also:
- Works with Ingenico Ogone (essential, extra or extra plus).
- Uses SHA (Secure Hash Algorithm) encryption and RIPEMD encryption for hardened security.
- Processes refunds directly in your WooCommerce admin panel.
- Is straightforward to set up with our instructional setup wizard.
- Is kept up to date to ensure your store’s payment stays secure.
To get started, download AG WooCommerce Ingenico Ogone Platform Gateway from the We Are AG store: https://weareag.co.uk/product/ag-woocommerce-ingenico-ogone-gateway
Note: Before following the steps below, you must have your Ingenico account setup and ready to go.
As well as this, you’ll need a test Ingenico account ready for the following steps. For help setting up your test account, follow this guide.
Then follow these steps:
- Go to Plugins > Add New > Upload Plugin
- Choose the zip file you downloaded, upload, and then click Activate Plugin
- Once activated, you’ll need to enter your licence key

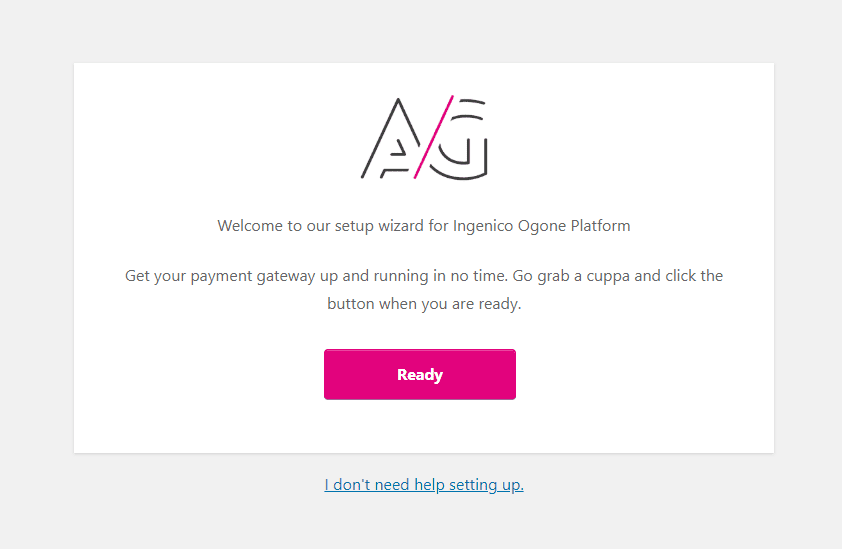
Once the plugin is activated, next you’ll be presented with a plugin wizard. This will take you through the steps you need to set up your Ingenico payment method.
Set up your Ingenico payment method
There are six steps to this wizard, they include the following:
- Step one asks you to input your Ingenico login ID, also known as PSPID.
- Step two tells you what operation mode you can use.
- Step three allows you to pick your SHA encryption method. This resource will help you if you need more information on SHA.
- Step four will ask you to set the SHA-IN pass phrase. SHA-IN is a complicated password you set yourself.
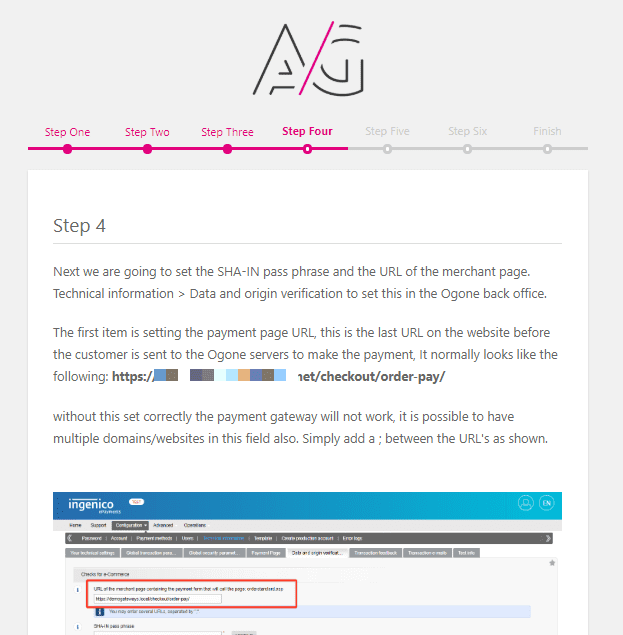
- Step five will ask you to check over a few settings in your Ingenico account and set up your SHA-OUT pass phrase.
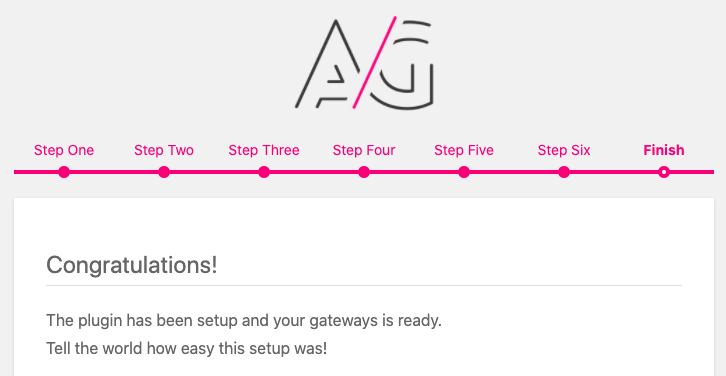
- Step six asks you to check a few more settings and gives you the option to see the plugin’s error log and add a test product. We recommend you tick both of these to help you while you set up your store.
That’s it! Your store is now set up and ready to start testing, debugging and above all, selling products.
For full information in what these sections mean, how to fill them in and test transactions, see our detailed documentation here: we-are-ag.helpscoutdocs.com/setup
In general, this process should take around 30 minutes to set up but we’re always on hand if you need a little extra support.
How to take invoice payments using Ingenico in WooCommerce
Ingenico Ogone and our AG WooCommerce Ingenico Ogone Platform Gateway plugin can also be used to take invoice payments through your online store. To set this up, do the following:
- Go to WooCommerce > Orders > Add Order.
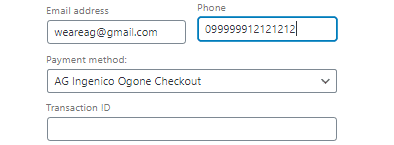
- Next, you’ll need to enter the customer and item information that will be used to generate your invoice in the Billing section.
- The email address you enter here will be used to send your customer/client their invoice. So make sure you double-check this.
- In the Payment Method drop-down, select AG Ingenico Ogone Checkout.
- Next, add the products/services you’re selling by clicking the Add Line Item(s) button in the next section below Order Details.

Now that you have all your items in your invoice, next we’ll generate the invoice to send to your customer/client.
- In the top right-hand corner, click the Order Actions dropdown and select Email Invoice / order details to customer.
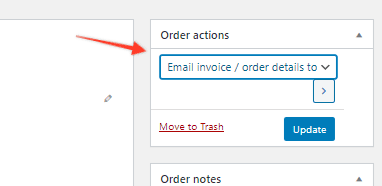
- Check over your invoice to make sure everything is correct and once happy, click Create.
- That’s it! your invoice will now be sent to your customer/client.
Your customer will then receive an invoice that looks a little something like this:
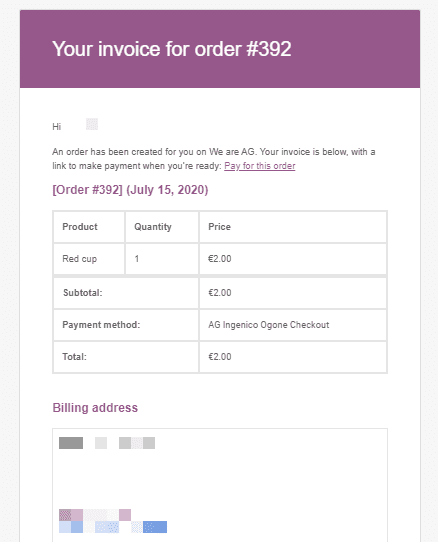
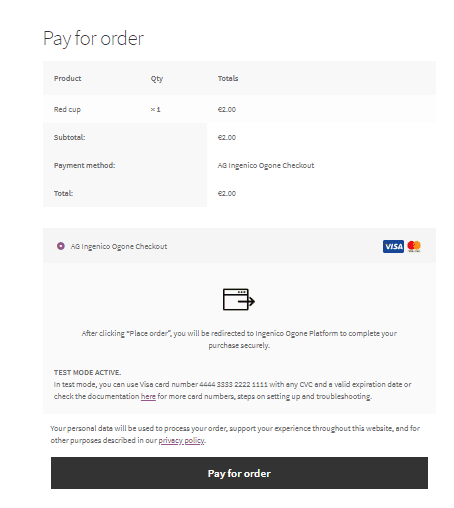
The ‘Pay for this order’ link in the email will redirect them back to your website where they’ll be able to make a payment using the payment method you selected.
Roundup: add Ingenico Ogone payment to your WooCommerce store
In this guide, you’ve learned why you might use Ingenico Ogone as your payment method of choice for your WooCommerce store and how to set it up in 30 minutes withAG WooCommerce Ingenico Ogone Platform Gateway plugin.
The investment you make in setting up a faster and more secure payment method such as Ingenico Ogone for your online store could work to increase customer trust, experience and as a result, reduce cart abandonment
The plugin mentioned in this guide:
- AG WooCommerce Ingenico Ogone Platform Gateway – Add a Ingenico Ogone payment gateway to your WooCommerce website with ease.